
Live captioning and transcripts in Zoom

For: StaffApplication: ZoomTagged: web conferencing , zoom
For accessibility purposes, you may want to enable live captioning for Zoom sessions. There are two ways to enable captions, the host can assign a participant to type notes or transcribe the audio, or Live Transcript can be enabled to display ‘machine-generated’ text. Please note that the Live Transcript is only available in English and, according to Zoom, the accuracy of the text may depend on the following variables:
- Background noise
- Volume and clarity of the speaker’s voice
- Speaker’s proficiency with the English language
- Lexicons and dialects specific to a geography or community
Please note: Apart from the external variables, machine-generated captions are not 100% accurate, especially when it comes to technical or specialised vocabulary.
This guide covers:
Enable live transcription in your account
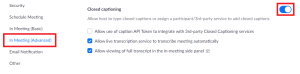
If the Closed Caption option is not available in your meetings, it must first be enabled in your account settings. Sign in to Zoom, click Settings, scroll down to In Meeting (Advanced), and enable the Close captioning setting. Tick the box beside Allow live transcription service to transcribe meeting automatically and Allow viewing of full transcript in the in-meeting side panel. Click Save and the captioning options will become available in your meetings.
Assign a participant to type captions
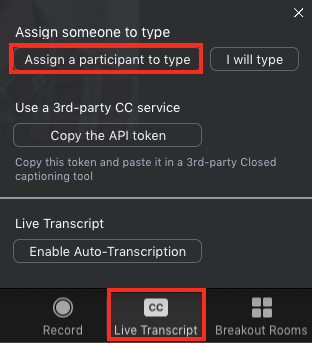
If a meeting participant has agreed to transcribe on your behalf, click the Closed Captioning button at the bottom of the window select the option Assign a participant to type. This will open the Participants panel where you find the user, hover your mouse over their name, click More, select Assign to type Closed Caption from the menu.
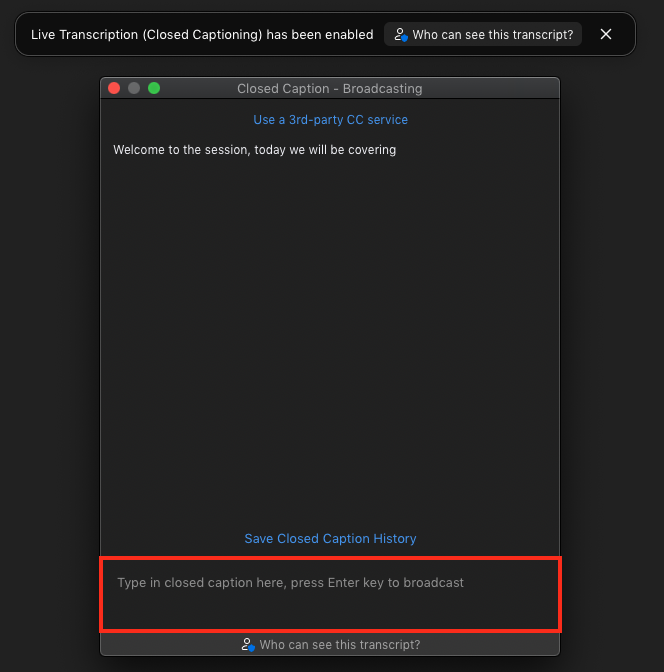
The captioner can click the Closed Caption button that opens a window where they can type notes to display during the meeting.
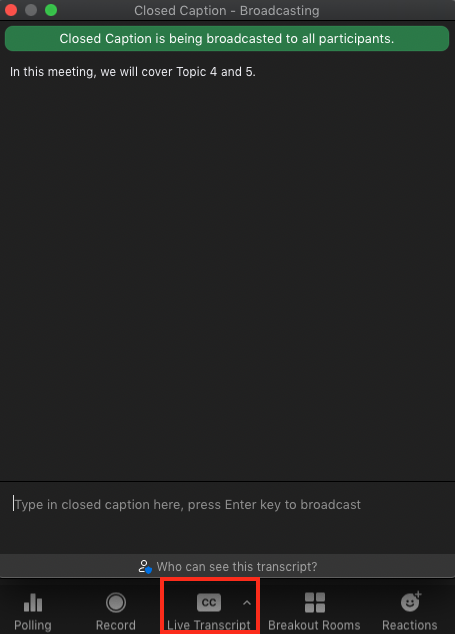
Notes can be typed and edited before displaying – pressing the return key will broadcast the text and add it to the meeting transcript.
Enable Live Transcript in a meeting
To enable machine-generated captions for a meeting, click the Live Transcript button at the bottom of the window and select Enable Auto-Transcription.
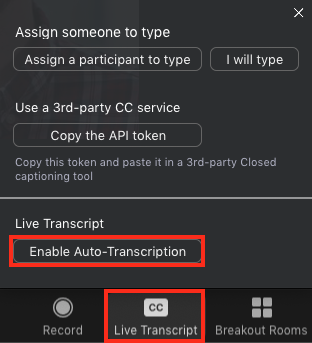
Captions will appear at the bottom of the content window for all attendees. If the meeting is recorded, the full transcript can be viewed beside the video when viewed in the Zoom cloud recording player.

Selecting the ‘arrow’ icon beside the Live Transcript button will display the options menu. From here you can select View Full Transcript to view all of the typed or generated text from the meeting.
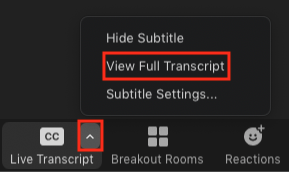
Click Save Transcript to download the full transcript as a text file on your PC.

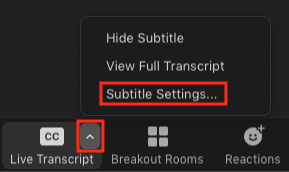
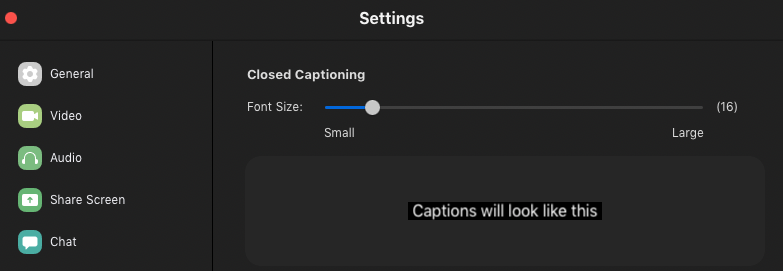
You can adjust the size of the displayed text from the Live Transcript menu by selecting Subtitle Settings or the Accessibility tab in the Zoom settings.
Use the slider to adjust the text size. A preview will display within the window.
Did this answer your query? If not, you can raise a ticket on the online Helpdesk or email: its-helpdesk@qmul.ac.uk . Alternatively you can also request a particular guide or highlight an error in this guide using our guides request tracker.
Produced by the the Technology Enhanced Learning Team at Queen Mary University of London.
Related items
