
Managing Participants, Chat and Polling in Teams

For: StaffApplication: MS TeamsTagged: Microsoft Teams , web conferencing
There are a number of features in Teams which allow you to manage and interact with participants during a meeting. This guide will highlight some of the options you may want to consider utilising, depending on the number of attendees and the type of session you are planning.
This guide covers:
Meeting options and permissions
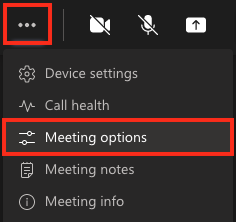
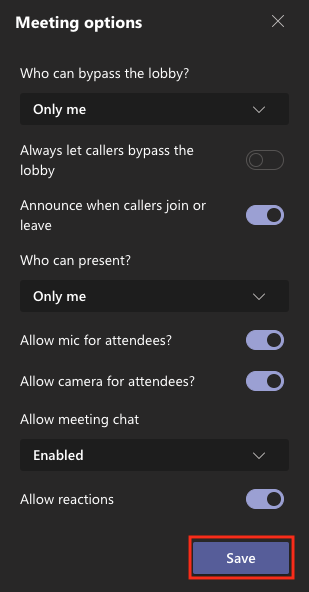
If you do not want attendees to have access to all of the available features in Teams, or you need time to prepare your session before allowing others to join, select the More actions (…) icon at the top of the meeting window and select Meeting options.
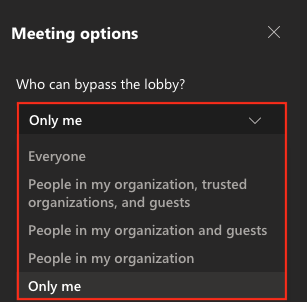
From this menu participants can be held in a lobby until you are ready for them to join. Use the ‘Who can bypass the lobby?‘ menu to select Only me.
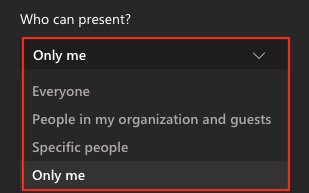
You can also manage participant permissions with the ‘Who can present?‘ menu. This allows you to choose who can access presentation features upon joining session. Select Only me from the menu if you do not want participants to share their screens.
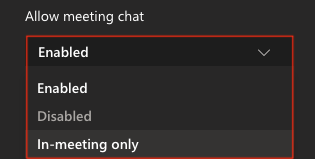
Use the ‘Allow meeting chat‘ menu to enable or disable the meeting Chat. Selecting In-meeting only enables the chat within the meeting for participants, but not in the main Teams window under the ‘Chat‘ tab.
Once your participant settings have been adjusted, click Save at the bottom of the panel.
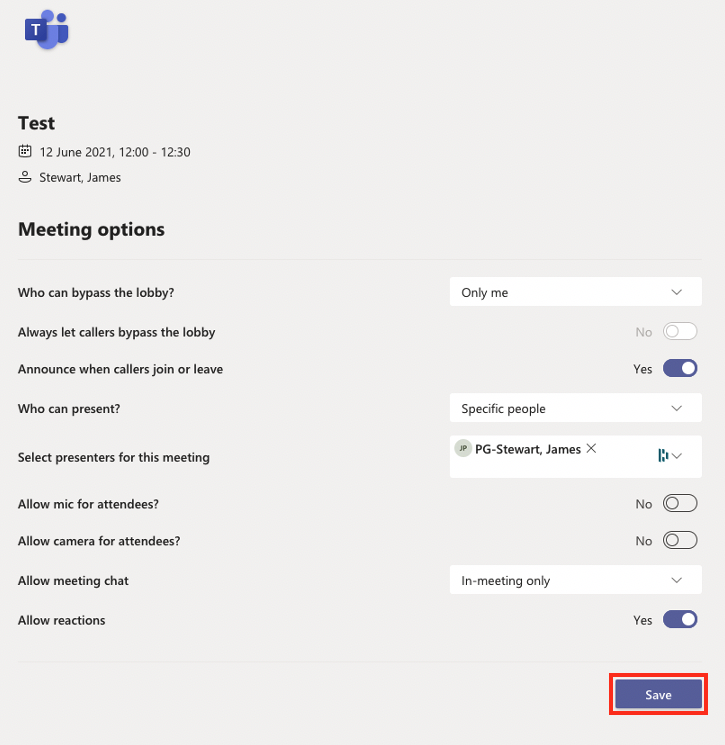
Meeting options can also be configured in advanced for meetings scheduled in Teams or Outlook. Open the calendar event and click the Meeting options link in the joining information.
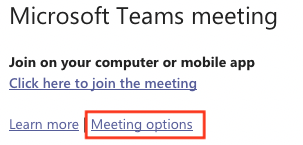
This will open a tab in your web browser where you can configure meeting options for participants. Click Save once the settings have been adjusted.
Meeting lobby
The lobby can be used to prevent participants from enter the main meeting room before the host is ready for the session to begin. This can be useful if you need to set up a presentation or test your audio and video settings before participants join. You can also use this feature to ensure that only the intended participants are admitted into the meeting.
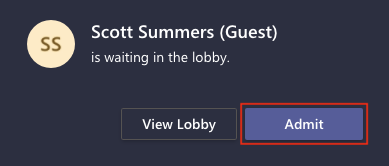
When the lobby is enabled, you will receive a notification when participants are waiting to join the meeting. Click Admit to allow the user to join immediately.
You can view and manage the waiting room using the Participants panel from the toolbar at the top of the window.
From this panel you can Admit all participants at once, or you can accept/reject individual participants under the Waiting in lobby section.

Based on your meeting settings, you can quickly view which participants have permissions as a presenter or Attendee.

Grant access or revoke features
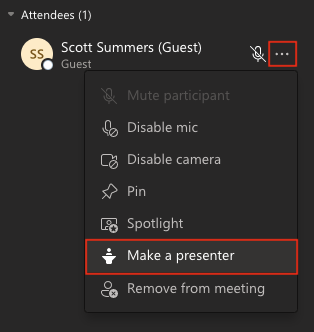
You can promote an attendee to become a presenter at any time during a meeting. Select the ‘…’ More actions menu beside their name in the Participants panel and select Make a presenter. You can also use this menu to disable a participant’s camera and microphone, or remove them from the meeting entirely.
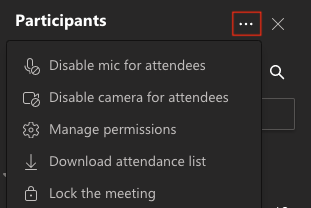
To manage all participants at once, open the ‘…’ More actions menu from the Participants panel and select Disable mic for attendees or Disable camera for attendees. Click Lock the meeting to prevent any additional users from joining.
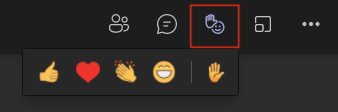
Reactions
Teams ‘reactions’ allow participants to communicate using nonverbal feedback and ‘raise their hand’ virtually to request the attention of the host. This feature can be accessed using the Reactions button in the toolbar at the top of the meeting window. Participants can select Raise Hand or choose a common emoji to express their feedback.
Reactions will display for other users in the meeting beside the participant’s name in their video panel and beside their name in the Participants panel.
Chat
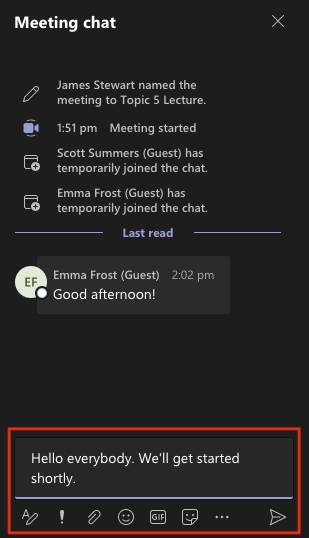
The meeting chat is useful for allowing a large number of participants to engage with the meeting host without the need for microphones. The chat can be used for participants to discuss topics, or to ask questions, without interrupting the host’s presentation. To use the chat, click the Chat button in the toolbar at the top of the meeting window.

In the text field, type your message and press return on your keyboard to send the message.
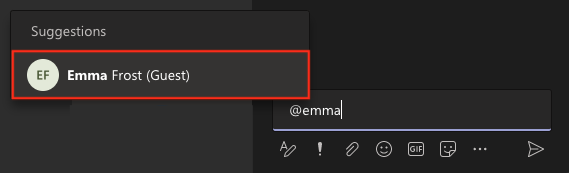
You can direct a message towards a specific participant in the chat. This will be visible to all participants, labelled for the recipient, and generate a notification on their screen. Begin by typing the ‘@’ symbol in the chat and enter their name. A suggestions box will appear – select the participant’s name from the list. Complete your message and press ‘return’ on your keyboard to send.
Example of how direct messages appear for the recipient:

Sharing files
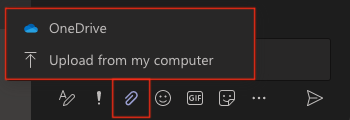
You can also send files from your computer to participants using the chat panel. Click the Attach files icon and select Upload from my computer to browse for the file on your PC. Files can also be shared from your OneDrive account where applicable.
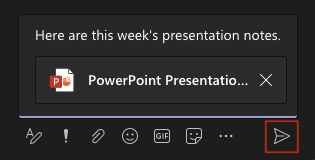
Selecting a file will place a link to the file in the chat panel for participants to download. You can add a message to accompany the file – press ‘return’ on your keyboard to send.
Polling
To create a quick poll for participants during a meeting, click the ‘…’ Meeting extensions button in the chat panel to open a list of Teams apps. Select Forms from the list.

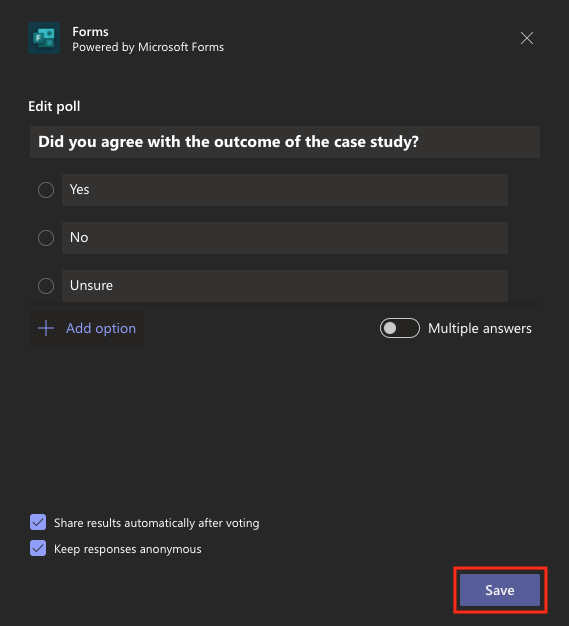
In the Forms window, enter your question, create options for participants to choose, and set whether participants can select a single answer or multiple answers. You can also choose whether to share the results after the poll and make responses anonymous. Click Save once the poll has been configured.
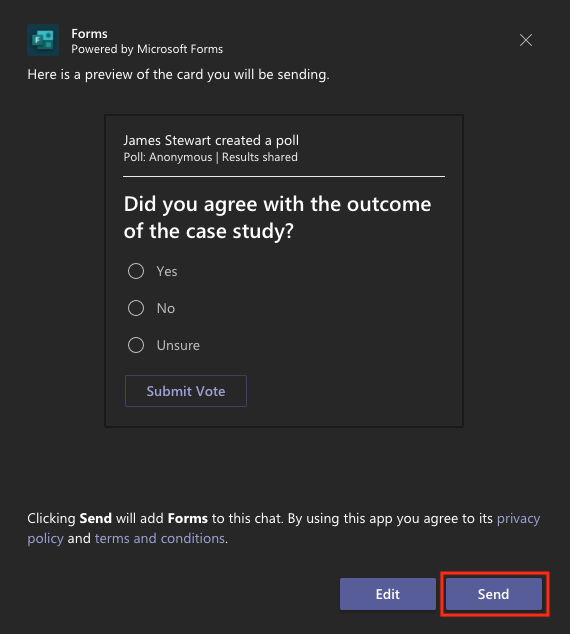
You will be presented with a preview of the poll in a window. You can Edit the question, or click Send to make the poll available to participants.
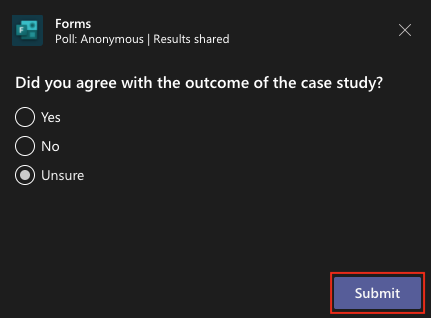
The poll will appear as a notification for participants in the meeting window and within the chat panel. They can select a response and click Submit.
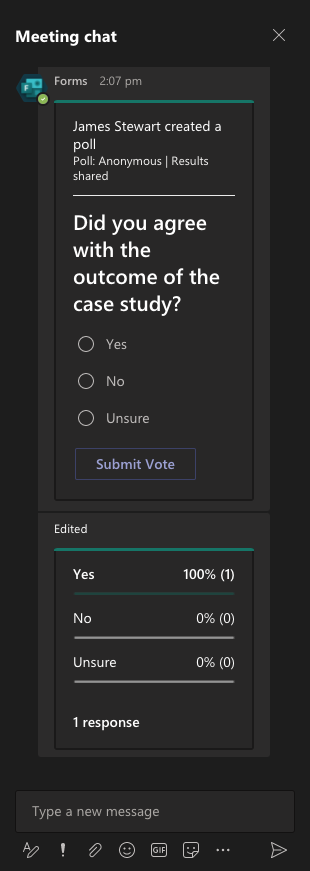
When the poll is completed, the results can be viewed within the chat panel.
Polling using Mentimeter
If you want to use more sophisticated polls, including quizzes and WordClouds, QMUL has an institutional license for the Mentimeter audience voting system. This is integrated with Microsoft Teams meaning that participants can vote in Mentimeter polls without leaving Microsoft Teams. For further information about using the Mentimeter/Teams integration please see our Using Mentimeter polling in Microsoft Teams guide.
Did this answer your query? If not, you can raise a ticket on the online Helpdesk or email: its-helpdesk@qmul.ac.uk . Alternatively you can also request a particular guide or highlight an error in this guide using our guides request tracker.
Produced by the the Technology Enhanced Learning Team at Queen Mary University of London.
Related items
