
Joining a Zoom Webinar

For: StudentApplication: ZoomTagged: web conferencing , zoom
As part of your programme, you may be asked to participate in live webinars using the Zoom online conferencing system.
This guide explains how to access webinars and actively participate online. More information about using features during a session can be found on the Zoom website. Lecturers should provide information regarding accessing your webinars and recordings.
This guide covers:
Before the session
Download Zoom
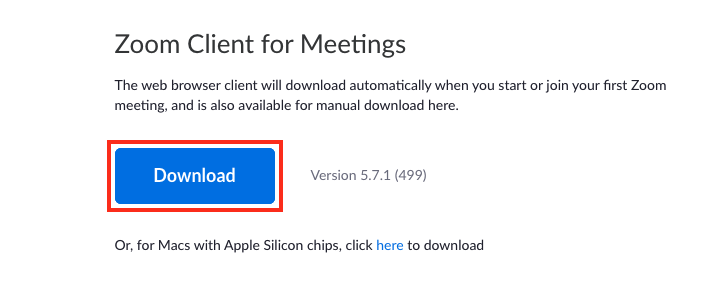
- Navigate to the Zoom Downloads page and click ‘Download’ under the Zoom Client for Meetings heading
- Open the Zoom installer file and follow the on-screen prompts to install the application
- Alternatively, the first time you attempt to join a Zoom meeting on your PC, you will be prompted to download and install the Zoom Client
- Zoom can also be accessed via the following web browsers:
- Windows: Edge 12+, Firefox 27+, Chrome 30+
- macOS: Safari 7+, Firefox 27+, Chrome 30+
- Linux: Firefox 27+, Chrome 30+
For mobile devices, the Zoom app can be installed via the iOS App Store and Google Play store.
Sign in to Zoom
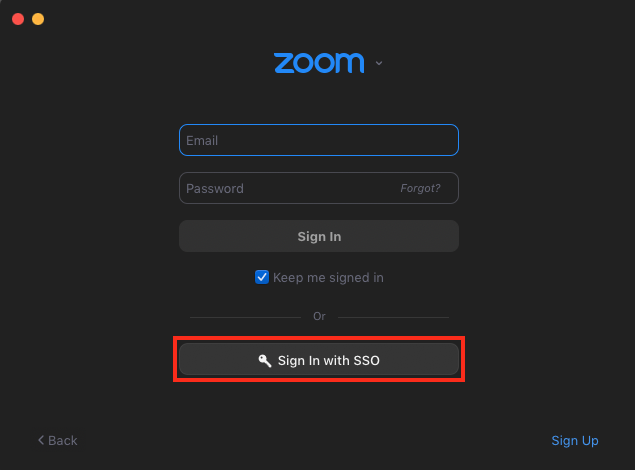
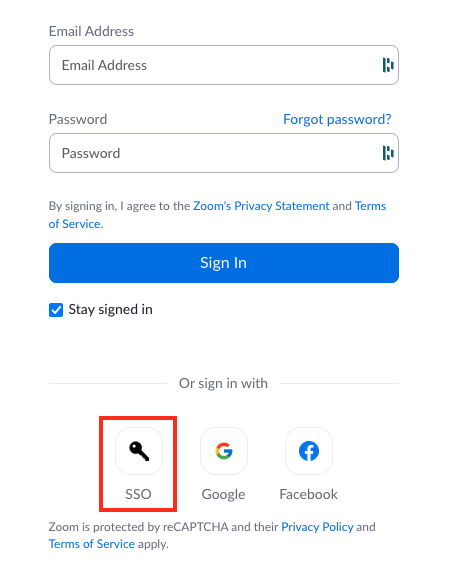
Open the Zoom app and click Sign in with SSO.
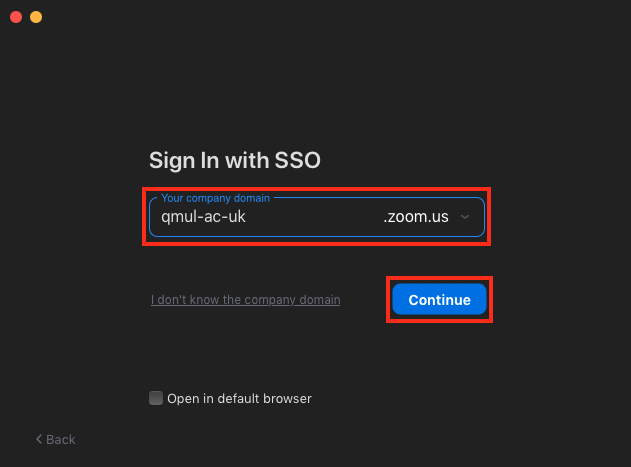
Under Your company domain, enter qmul-ac-uk and click Continue.
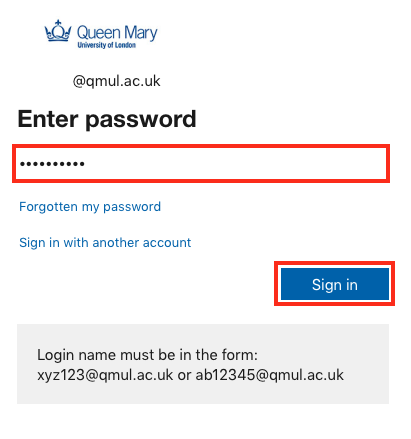
Follow the prompts to enter your QMUL email address and password. Click Sign in.
How to join a session
Lecturers may send you a link to join a Zoom session directly. Clicking this link will automatically open your Zoom client and join the session. Consider the following before joining your first session:
- You will need a computer, reliable internet connection, headphones, and a microphone (if required to speak)
- Try to use headphones, even if they do not include a microphone, as this will reduce the risk of echo or audio feedback during discussion
- Ensure that you are in a quiet space where you can listen and talk
- If presenting using a webcam, sit in a well-lit place and with a neutral background
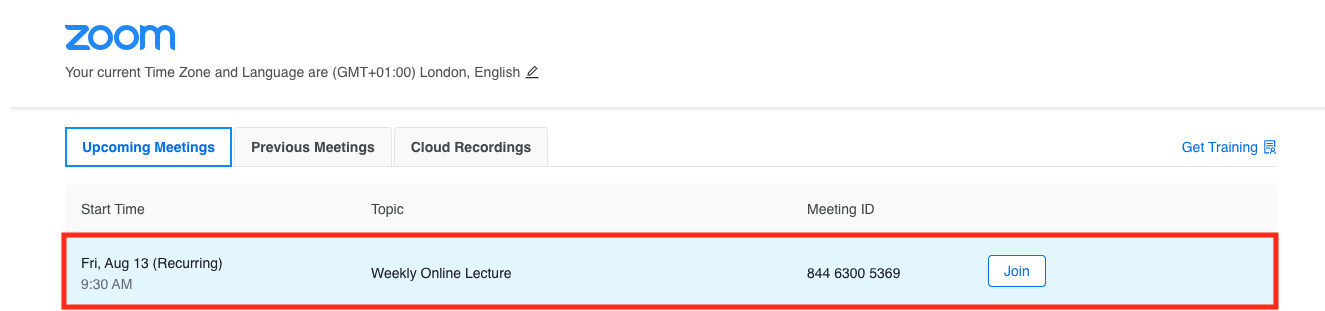
If the session has been added to QMplus, navigate to your module page and open the joining link.

Upcoming meetings will be listed within QMplus. Locate the session and click Join.
Test your audio
Ensure your audio and video devices are tested and working as expected. Follow the steps below to test your speaker and microphone.
When first joining a meeting, you will be prompted to Join Audio. Clicking this option will open a window where you can tick a box to always Automatically join audio by computer when joining a meeting.
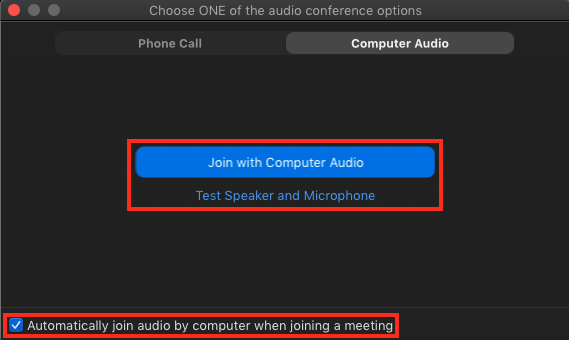
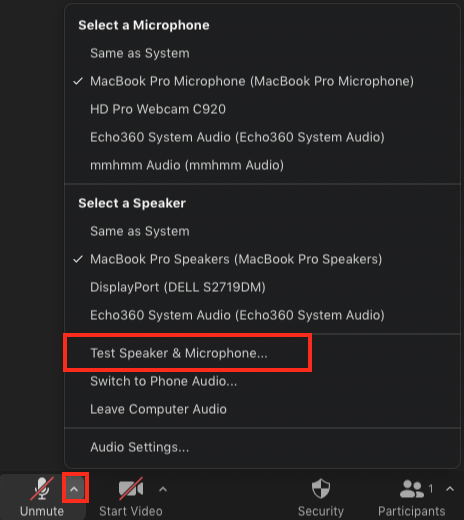
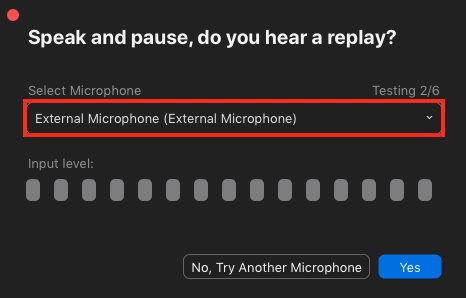
There will also be an option to Test Speaker and microphone – this will step you through Zoom’s audio setup options. If you are not presented with this window, click the ‘arrow’ icon beside the Mute/Unmute button at the bottom of the window and select Test Speaker & Microphone from the menu.
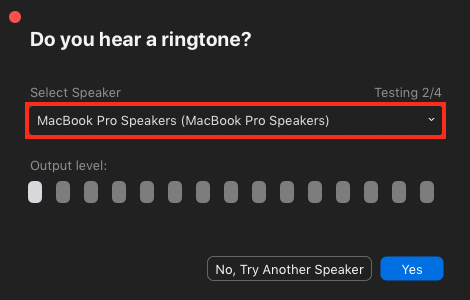
The speaker test will play a sound – select yes or no depending on whether you hear the tone. Consider where the tone was played (i.e., from headphones or connected speakers) and use the Select Speaker menu to choose a different device if required. Click Yes to continue.
The next window will prompt you to speak into your microphone, playing back your voice with a short delay. This allows you to hear a preview from your audio device. If you are unable to hear your voice or if the audio sounds like it is coming from the wrong microphone (i.e., a laptop microphone rather than a headset), use the Select Microphone menu to select the correct device and test again. Once satisfied with the audio quality, click Yes to end the test.
Participate during a session
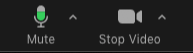
Ensure your microphone is muted when you are not speaking to reduce background noise or echoing. Click the microphone or video icon to unmute/enable each option.
Click the Reactions button in the lower toolbar to raise your hand or express an opinion (such as agree/disagree). Click the same icon a second time to clear the reaction.

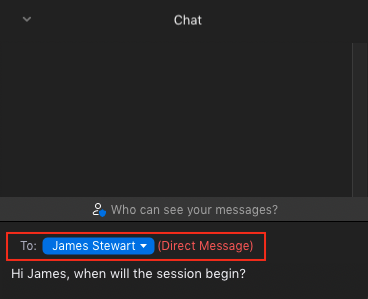
Click the Chat button in the lower toolbar to access the chat panel.

Type your message and press ‘Return’ on your keyboard to submit a message to everyone in the session.
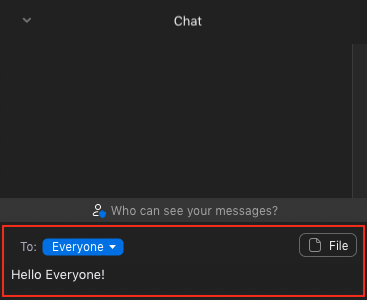
Using the To: menu, you can select a specific user to direct message. Please note, this feature may be disabled by the host.
How to access session recordings
If you are granted access to a session recording, the lecturer may choose to distribute the video using a variety of platforms. It may be embedded in your QMplus module or a link to view the recording via Zoom. Please note, recordings will only be made available at the discretion of your lecturer.
If you are provided with a Zoom recording link, you may need to sign in to your account after clicking the link. Select the SSO option at the bottom of the page and follow steps at top of this guide to sign in using your QMUL account.
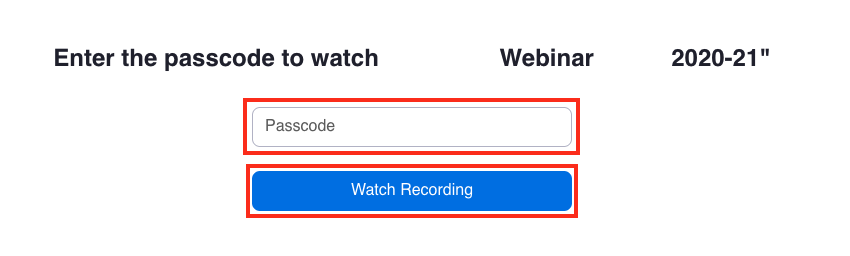
If the recording is passcode protected, you will need to enter it prior to accessing the video. This should be provided to you along with the link to access the recording. Enter the passcode and click Watch recording.
Did this answer your query? If not, you can raise a ticket on the online Helpdesk or email: its-helpdesk@qmul.ac.uk . Alternatively you can also request a particular guide or highlight an error in this guide using our guides request tracker.
Produced by the the Technology Enhanced Learning Team at Queen Mary University of London.
Related items
