
Scheduling Zoom meetings and providing access on QMplus

For: StaffApplication: ZoomTagged: web conferencing , zoom
When planning upcoming teaching sessions, online presentations, or events, you may want to schedule Zoom meetings in advance. You can schedule single meetings or recurring sessions (i.e., your teaching schedule for the term), which allows you to generate joining information to share with participants. Meeting access links can be posted on QMplus, added to an Outlook calendar invitation, or shared via email.
Each meeting scheduled from your Zoom account may be configured based on the type of session or number of attendees (i.e., teaching, public event, or meeting with colleagues). You can also adjust the security settings ranging from fully accessible public links to password protected meetings only available to pre-registered users, depending on the sensitivity of the meeting.
This guide covers:
Scheduling a meeting in QMplus
Scheduling a Zoom session is a 2-part process. First you need to add the Zoom activity to your QMplus module area. Then you need to set up the Zoom sessions within the Zoom activity.
Add the Zoom activity to your QMplus module area:
- First log in to your QMplus account and navigate to the relevant module page. At the top of the page, click the pencil icon to Turn editing on.
![]()
2. Scroll down to the Topic in which the meeting link should appear and click + Add an activity of resource.
3. Using the Activity Chooser window, select External tool from the list.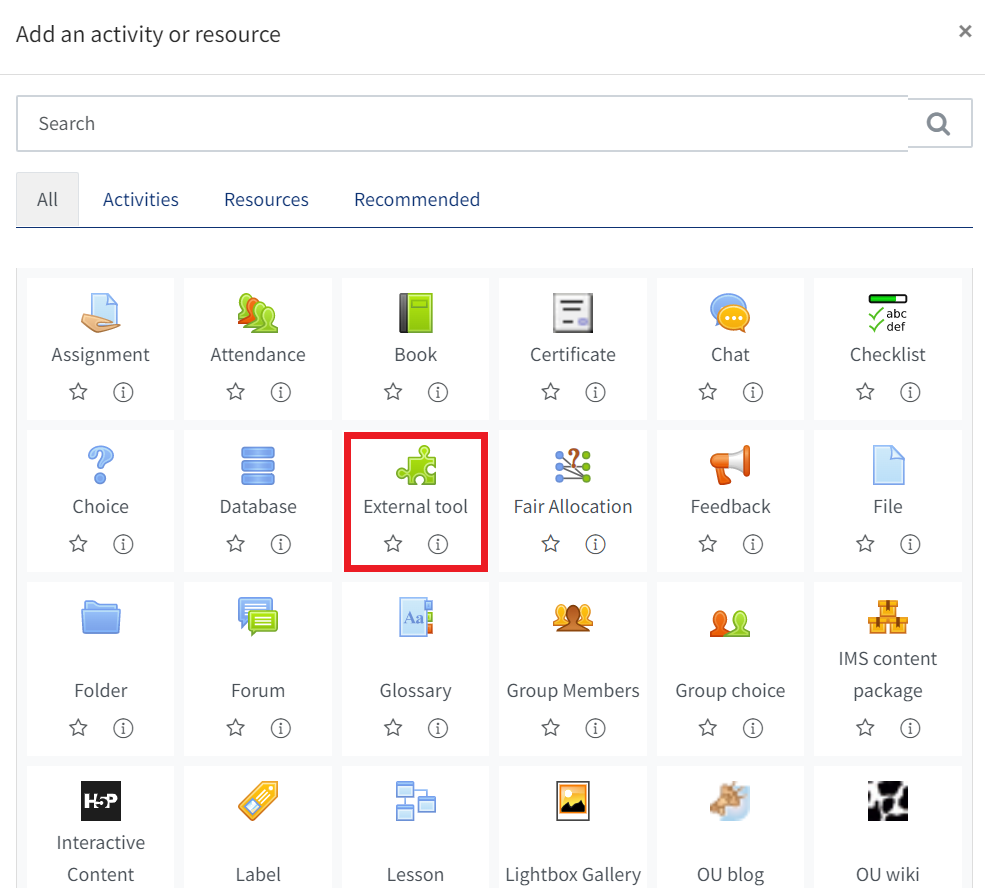
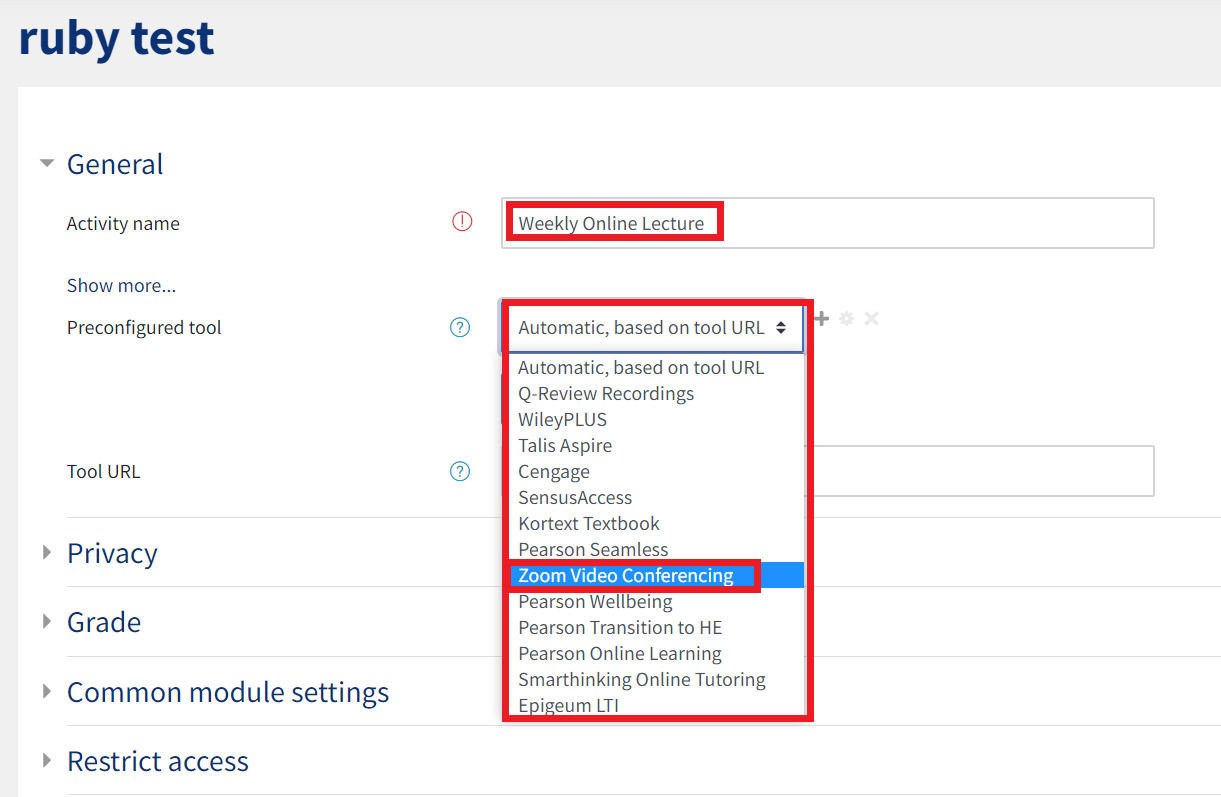
5. Give the meeting a name using the Activity name field
6. Click the menu beside Preconfigured tool and select Zoom Video Conferencing from the menu.
7. Scroll down and click Save and display.
You will be presented with an overview of the meetings in your Zoom account.
Set up the Zoom sessions:
The next step is to set up the actual Zoom meeting(s).
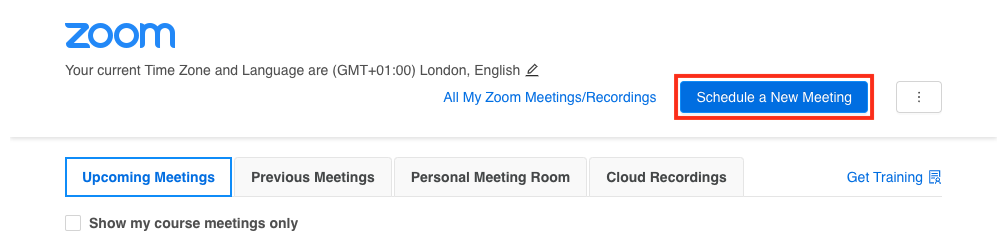
8. Click Schedule a New Meeting.
9. Name your meeting in the Topic field (include your module code in the topic name), adjust the start date, time, and duration of the session.
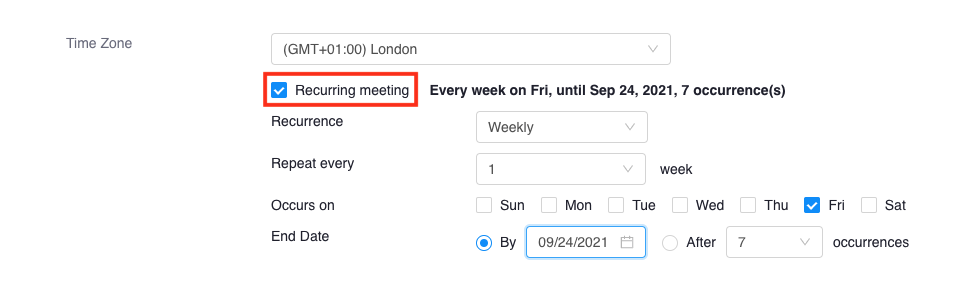
10. If you are scheduling a series of sessions, tick Recurring meeting to reveal additional settings.
Using Recurrence, set the frequency of the meeting. Then adjust how often the meeting should repeat and set the day(s) of the week. You can also set the schedule to run until a specified date, or after a specific number of occurrences.
When scheduling a session from within QMplus, only students who are enrolled on your module will have access to the joining link. However, if additional security is required, or you have concerns about the access link being shared with others, you can tick Registration to restrict entry to specific Zoom accounts. More information on user registration is available on this page.
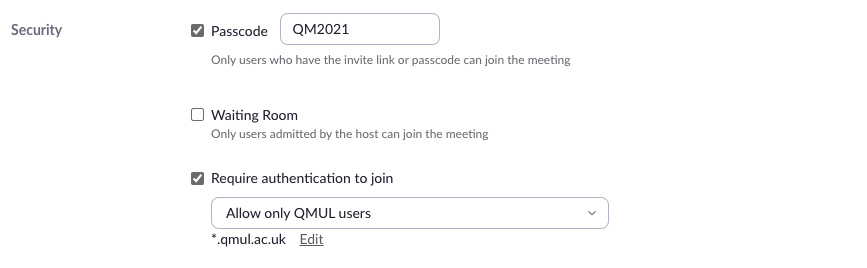
Additional security settings will allow you to set a Passcode and require users to be logged in with a Zoom account before joining the meeting. Ticking Require authentication to join will allow you to specify if only users with a ‘@qmul.ac.uk’ email address can access your meeting.
Tick the Waiting Room option if you would like participants to wait in a lobby before the meeting begins. You can grant access to participants in the waiting room individually, or simply close the waiting room when you are ready for everyone to join the meeting.

Meeting options in QMplus
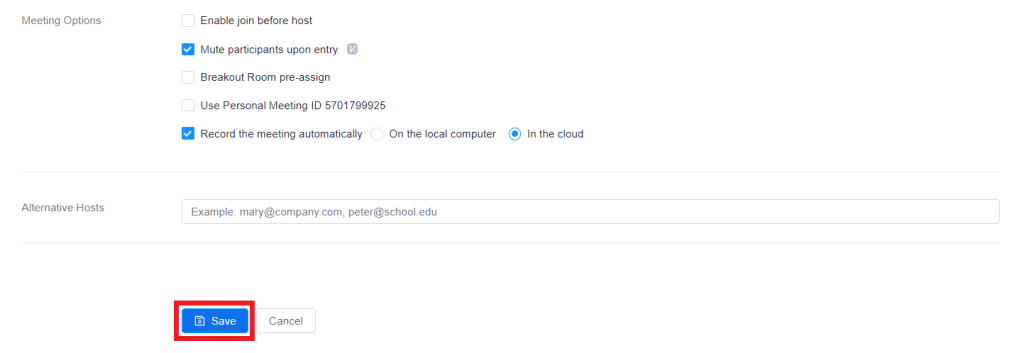
There are several additional settings that you may want to consider adjusting prior to scheduling your meeting. At the bottom of the page, before clicking Save to confirm the schedule you can adjust the following:
- Enable join before host will allow participants to enter the meeting room before the Host. This setting is not recommended if you require some setup time prior the session starting. This setting will not work when the Waiting Room is enabled, as participants will not be able to bypass the lobby.
- Mute participants upon entry automatically mutes the microphones of participants as they join the meeting. This is particularly useful for large meetings to help prevent background noise participants unaware their microphones are unmuted. Participants can unmute themselves at any time unless this has been disabled in the meeting settings.
- Breakout Room pre-assign allows the meeting host to pre-arrange meeting participants into breakout rooms when scheduling the meeting. This can be useful if how the participants will be grouped is known in advance of the meeting.
- Automatically record meeting initiates the meeting recording as soon as the host joins the room. This can be helpful in cases where there are concerns about remembering to manually start the recording at the beginning of a meeting. Meetings can be set to record on the local computer or in the cloud. Note: Cloud recordings are automatically transferred to your QMplus Media account.
- Alternative Hosts can be used to specify any users who should be automatically granted Co-Host permissions upon entering the meeting. This setting is helpful if specific participants or colleagues will be joining to help facilitate or moderate the meeting. Co-Hosts can access most features such as start/stop/pause recordings, screen sharing, participant management, and polling. Add alternative hosts by searching the user’s name or email address.
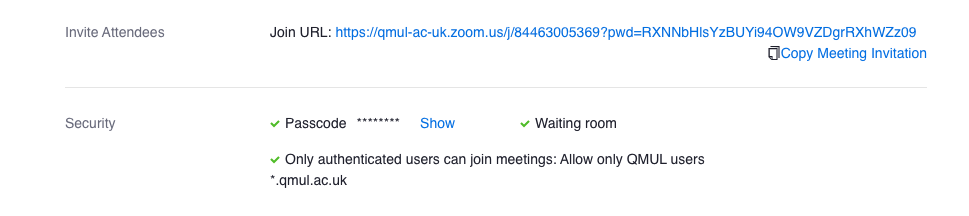
The joining URL will be automatically available for students enrolled on your QMplus module. You can also copy and send the meeting invitation to other users using the link on your meeting confirmation page.
Return to your QMplus module page to view the access link. You can return to this page at any time to join the session or edit the settings.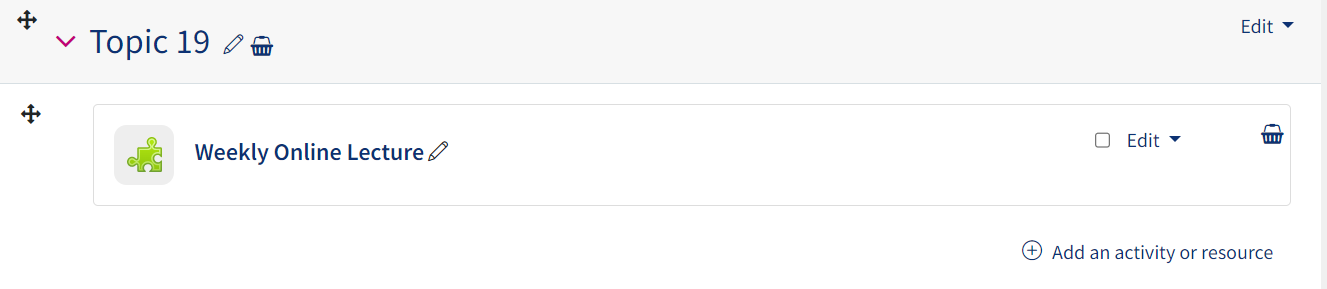
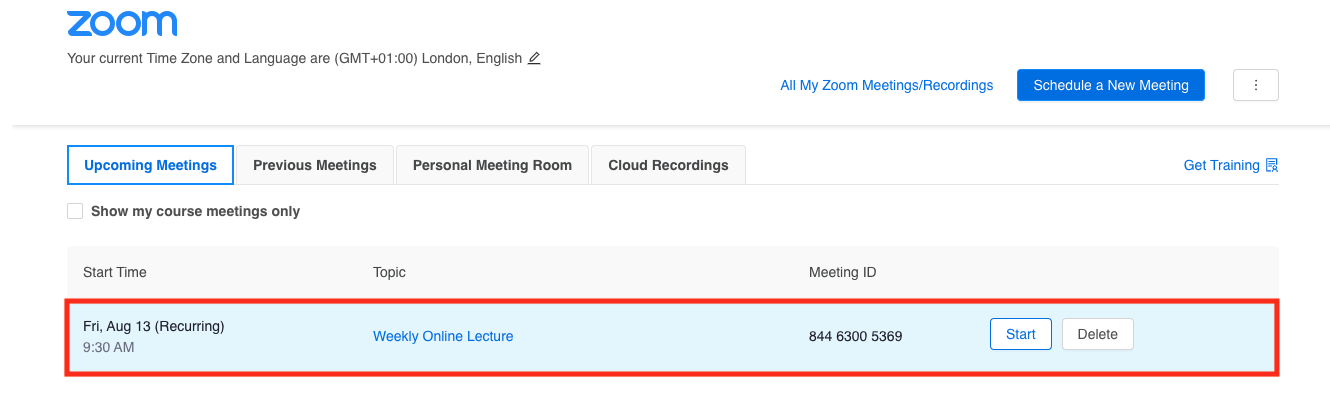
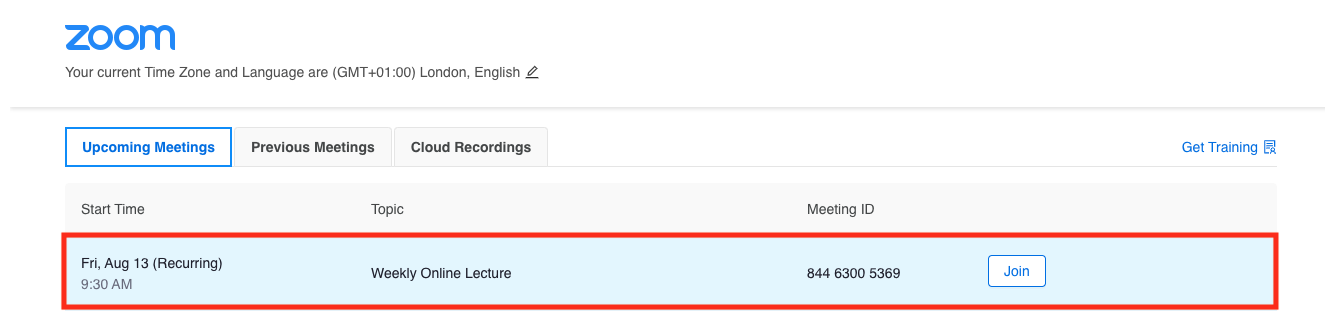
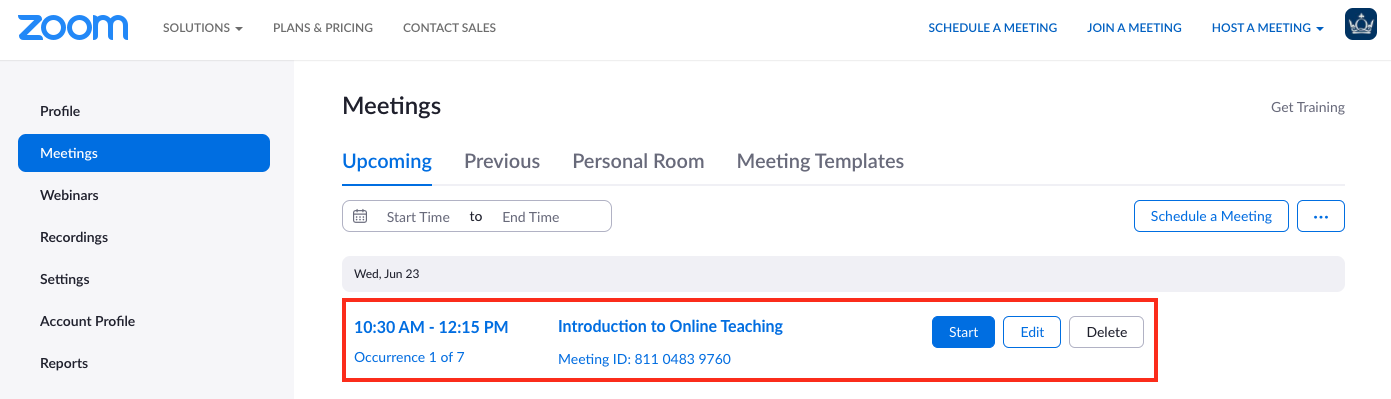
When opening the link, under Upcoming meetings, you can click the meeting title to edit the settings or Start to open the meeting room.
Students will see a similar screen when opening the link in QMplus. They can attend the session by clicking the Join button.
Scheduling a meeting in Zoom
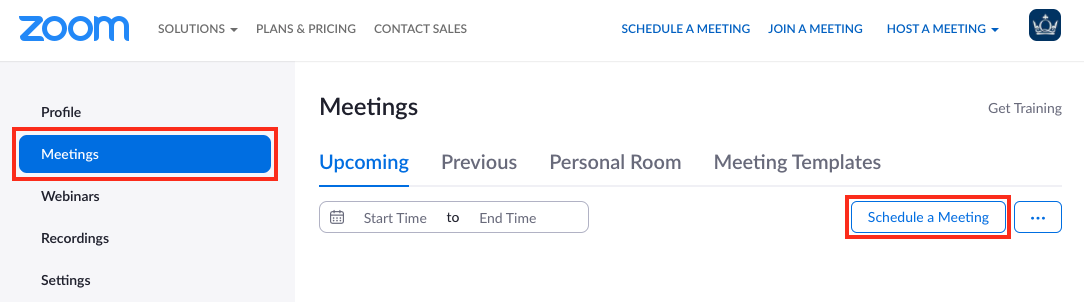
To begin scheduling a meeting in Zoom, sign in to your QMUL Zoom account. Select Meetings from the menu and click Schedule a meeting.
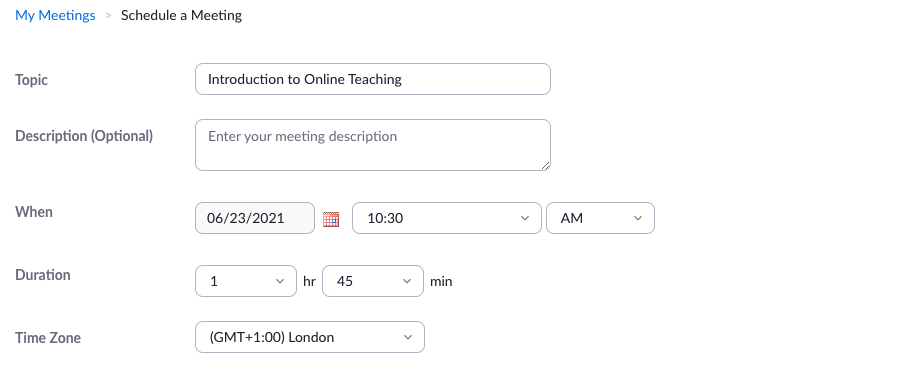
Name your meeting using the Topic field, adjust the start date, time, and duration of the session.
If you are scheduling a series of sessions, tick Recurring meeting to reveal additional settings.
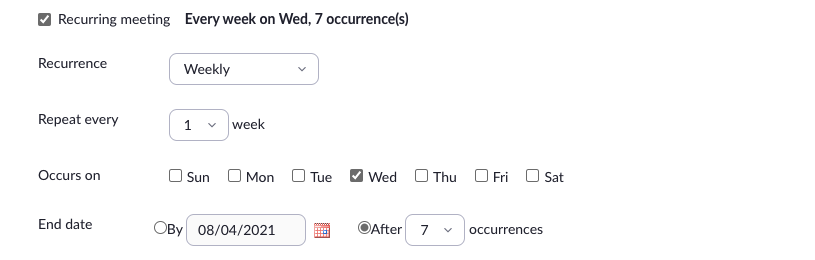
Using Recurrence, set the frequency of the meeting. Then adjust how often the meeting should repeat and set the day(s) of the week. You can also set the schedule to run until a specified date, or after a specific number of occurrences.
Security settings
If you have not scheduled a session from within QMplus (which will only display the joining link to enrolled students), sharing the joining information with those who should be in attendance is typically sufficient to ensure the appropriate users attend your meetings . However, if additional security is required, or you have concerns about the access link being shared, you can tick Registration to restrict entry to specific Zoom accounts. More information on user registration is available on this page.
Additional security settings will allow you to set a Passcode and require users to be logged in with a Zoom account before joining the meeting. Ticking Require authentication to join will allow you to specify if only users with a ‘@qmul.ac.uk’ email address can access your meeting, or anyone with a Zoom account. External Zoom users may be tagged as a ‘Guest’ during the meeting. By default, participants who are removed from a session are unable to re-join. Using the ‘require authentication’ setting is an easy way to restrict the number of people who can access your sessions and increase security without needing to register each user individually in advance.
Tick the Waiting Room option if you would like participants to wait in a lobby before the meeting beings. You can grant access to participants in the waiting room individually, or simply close the waiting room when you are ready for everyone to join the meeting.
Meeting options in Zoom
There are several additional settings that you may want to consider adjusting prior to scheduling your meeting. At the bottom of the page, before clicking Save to confirm the schedule you can adjust the following:
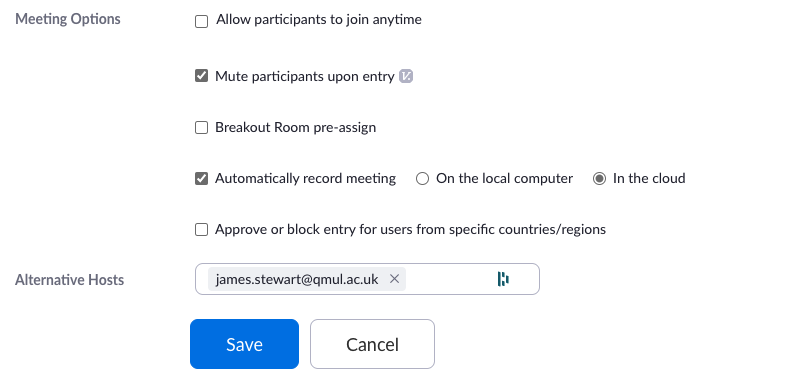
- Allow participants to join anytime will allow participants to enter the meeting room before the Host. This setting is not recommended if you require some setup time prior the session starting. This setting will not work when the Waiting Room is enabled, as participants will not be able to bypass the lobby.
- Mute participants upon entry automatically mutes the microphones of participants as they join the meeting. This is particularly useful for large meetings to help prevent background noise participants unaware their microphones are unmuted. Participants can unmute themselves at any time unless this has been disabled in the meeting settings.
- Breakout Room pre-assign can be used to specify the number of breakout rooms and the specific participants for each room. This can be done manually or using a CSV file upload. More information on breakout rooms is available on this guide.
- Automatically record meeting initiates the meeting recording as soon as the host joins the room. This can be helpful in cases where there are concerns about remembering to manually start the recording at the beginning of a meeting. Meetings can be set to record on the local computer or in the cloud. Note: Cloud recordings are automatically transferred to your QMplus Media account.
- Approve or block entry for users from specific countries/regions is a security setting to ensure only users from specific countries or regions can enter your meeting room.
- Alternative Hosts can be used to specify any users who should be automatically granted Co-Host permissions upon entering the meeting. This setting is helpful if specific participants or colleagues will be joining to help facilitate or moderate the meeting. Co-Hosts can access most features such as start/stop/pause recordings, screen sharing, participant management, and polling. Add alternative hosts by searching the user’s name or email address.
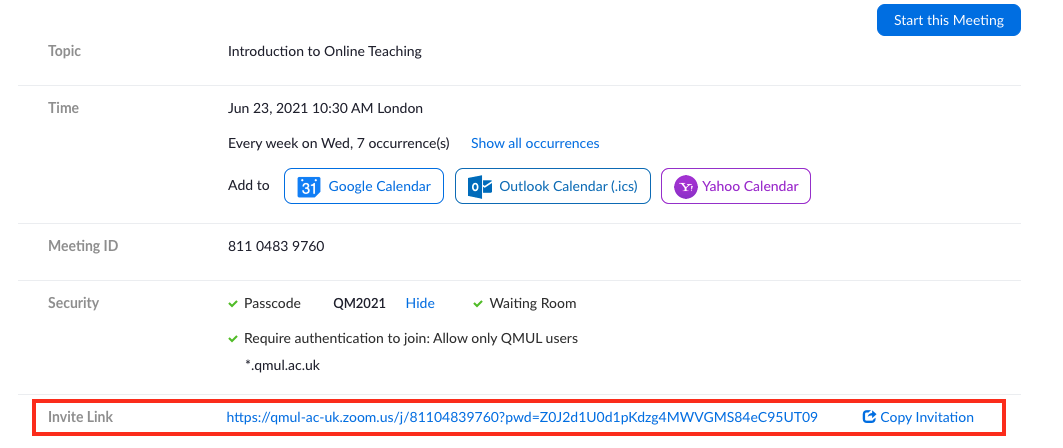
Meeting confirmation page
Once you save the meeting schedule, you will be presented with a confirmation page with access details to share with participants. If your account is set to embed meeting passcodes within the invitation link (this is enabled by default) you can simply copy the Invite Link URL and share it with participants via email, calendar event, or post it to QMplus.
Scroll to the bottom of the page if you would like to add Polls to your meeting or click Edit if you need to update the schedule with further changes.
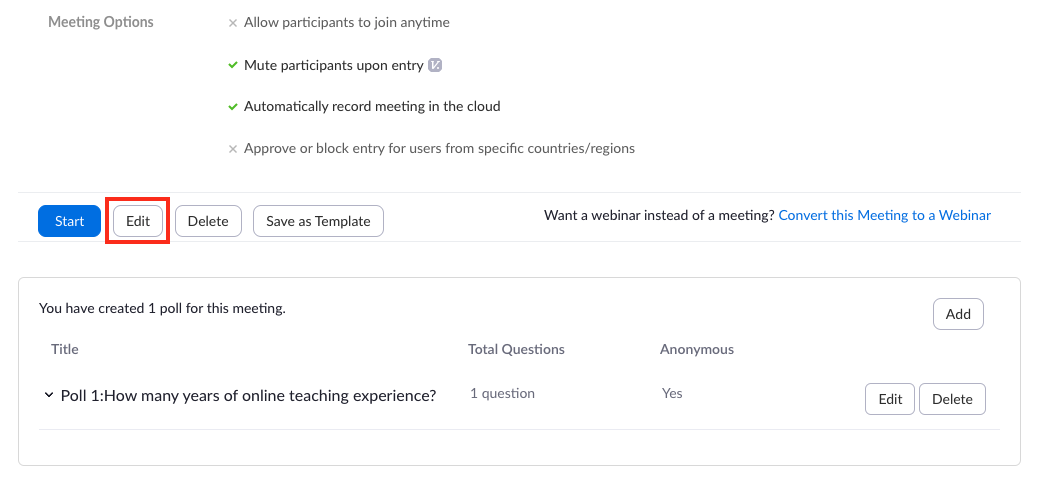
From the Meetings page in your Zoom account, you can view all your scheduled meetings. Click the meeting title to view access details, click Edit to update the meeting settings, or click Delete to remove the meeting from your account.
Adding access links to QMplus
If you would like to post a meeting link on QMplus for students, log in to your account and navigate to the page you would like to update. With Editing enabled, click Add an activity or resource under the relevant topic.
With the activity chooser, scroll down, select URL and click Add.
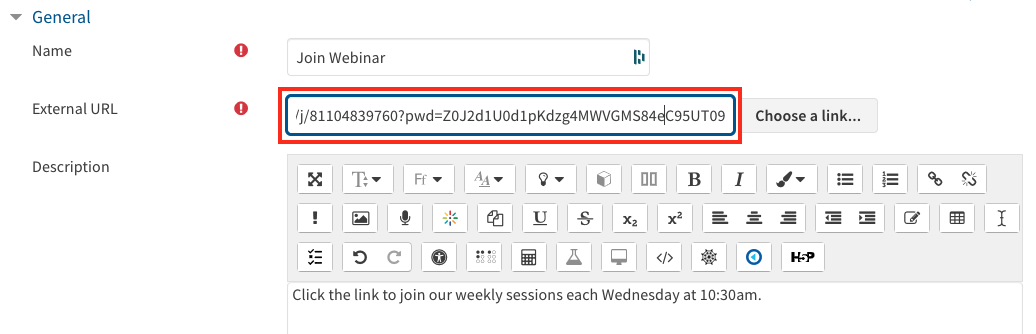
Give the link a Name and paste your Zoom access link in the External URL field. In the Description you can add the date and time of the meeting and the passcode (if applicable). Scroll down and click Save and return to course to add the URL.
Students can click this link in QMplus to automatically launch the meeting.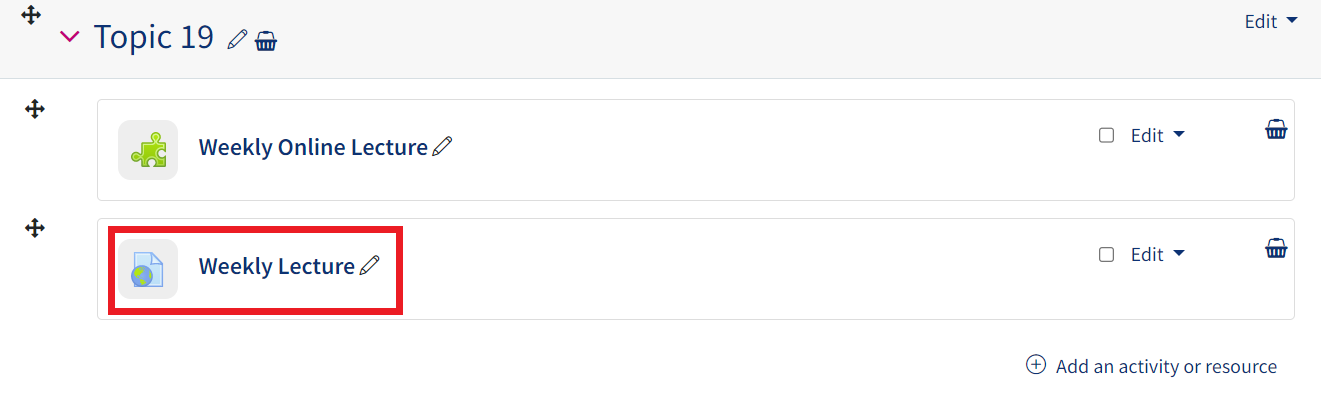
The same link can be used multiple times for recurring meetings, and only needs to be shared with participants once. For further information on adding activities and resources to QMplus, see this guide.
Did this answer your query? If not, you can raise a ticket on the online Helpdesk or email: its-helpdesk@qmul.ac.uk . Alternatively you can also request a particular guide or highlight an error in this guide using our guides request tracker.
Produced by the the Technology Enhanced Learning Team at Queen Mary University of London.
Related items
