
Using the Q-Review Universal Capture software

For: StaffApplication: After making a recording , Before making a recording , Getting started with Q-Review , Q-ReviewTagged: Acquisition , Featured , Recording , screencast , video
This page covers:
Introduction
If:
- You are unable to book into a Q-Review lecture capture enabled room
- You want to record additional teaching material
- You require greater flexibility in when you complete the editing of your recorded footage.
you can record your lecture or event using Universal Capture. The software can be installed onto a computer or laptop allowing you to be able to record from the comfort of your desk, or take your laptop to the teaching room.
Universal Capture allows users to:
- Capture content being displayed on their screen (including any videos being played)
- Capture their voice using a microphone
- Capture video using a webcam
- Start and stop recording directly from the computer
- Publish recordings
- Paste a link to the published recording onto a website or blog
Installing Universal Capture on your computer
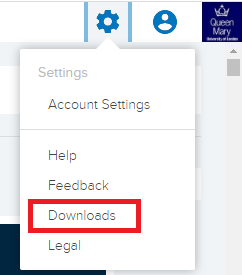
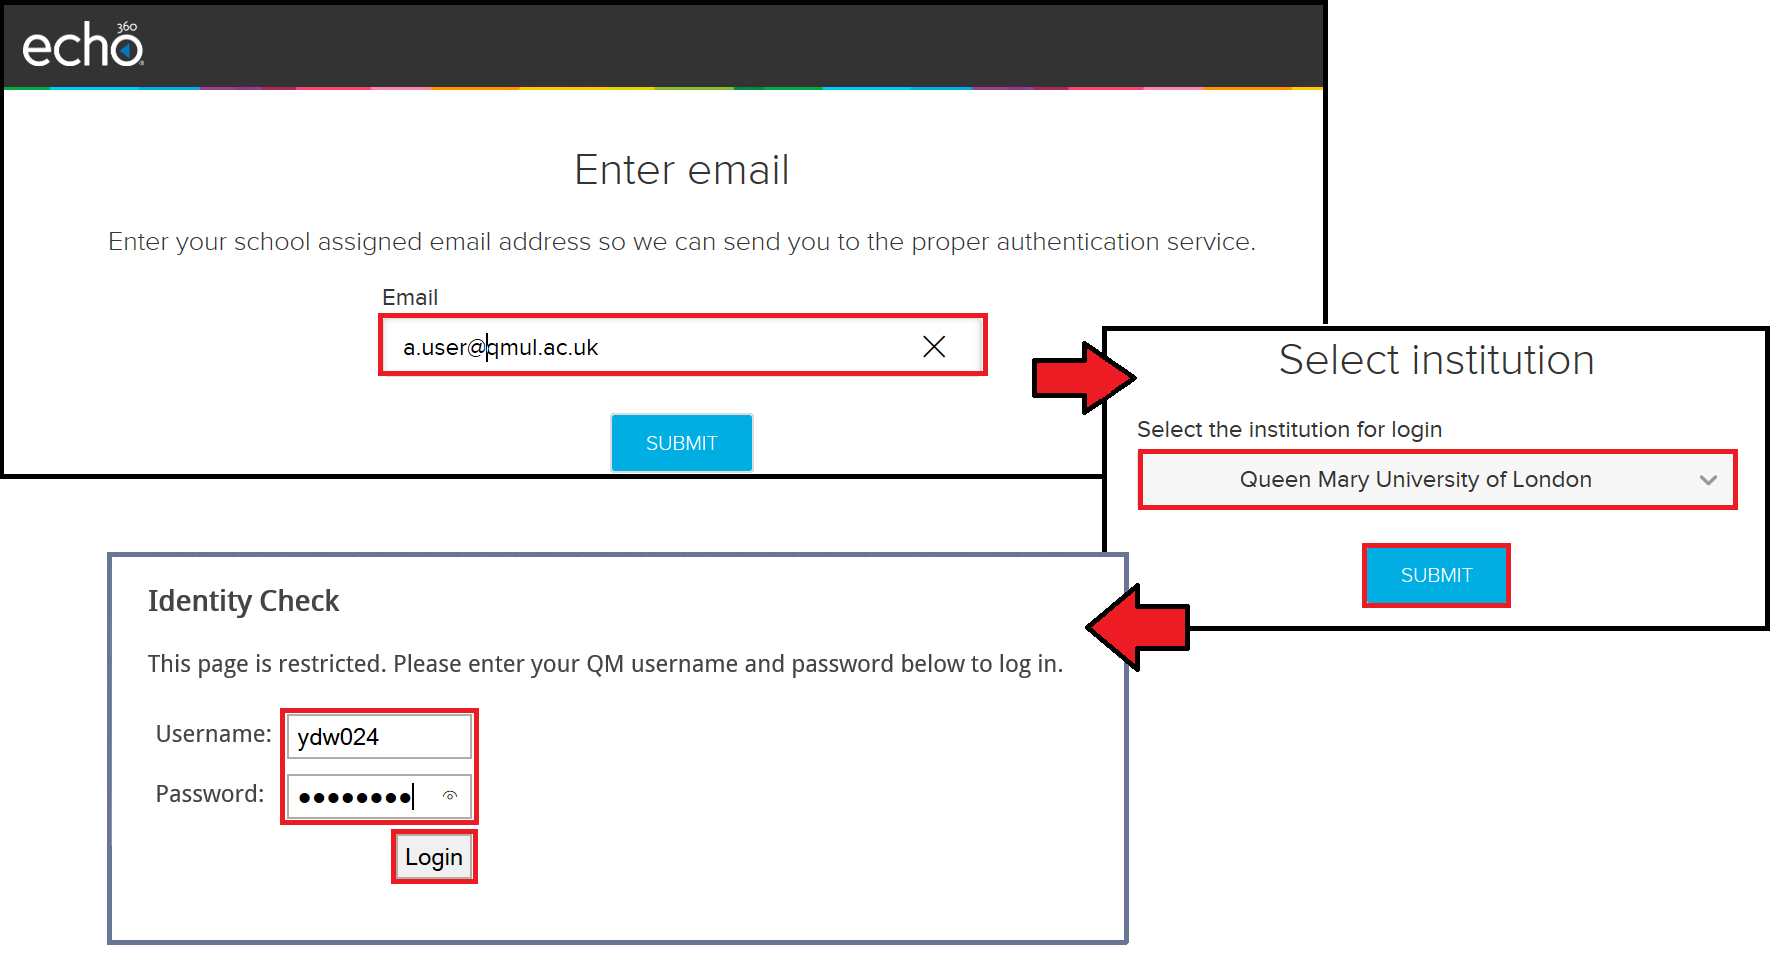
Log in to Q-Review (echo360.org.uk), logging in ‘via institution’ and click on the cog in the top right corner to select ‘Downloads’.
Once you’ve clicked on ‘Downloads’ select which ‘Universal Capture: Personal’ version you need to download: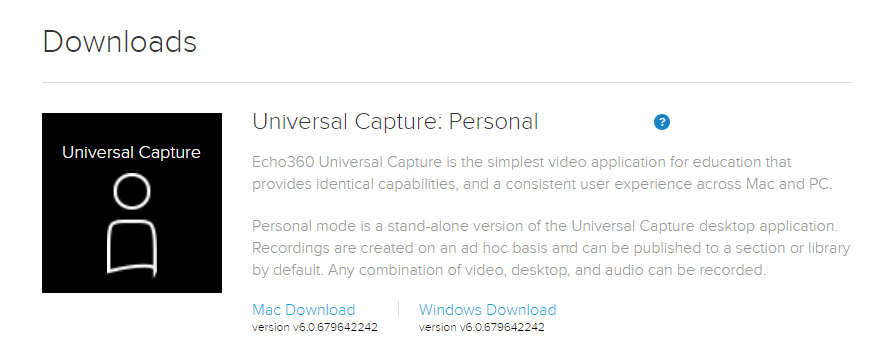
Making a recording
Before you make a recording:
- Please ensure what you are recording is not copyrighted material
Before launching the software, you should connect all the required hardware (i.e. microphone, camera).
-
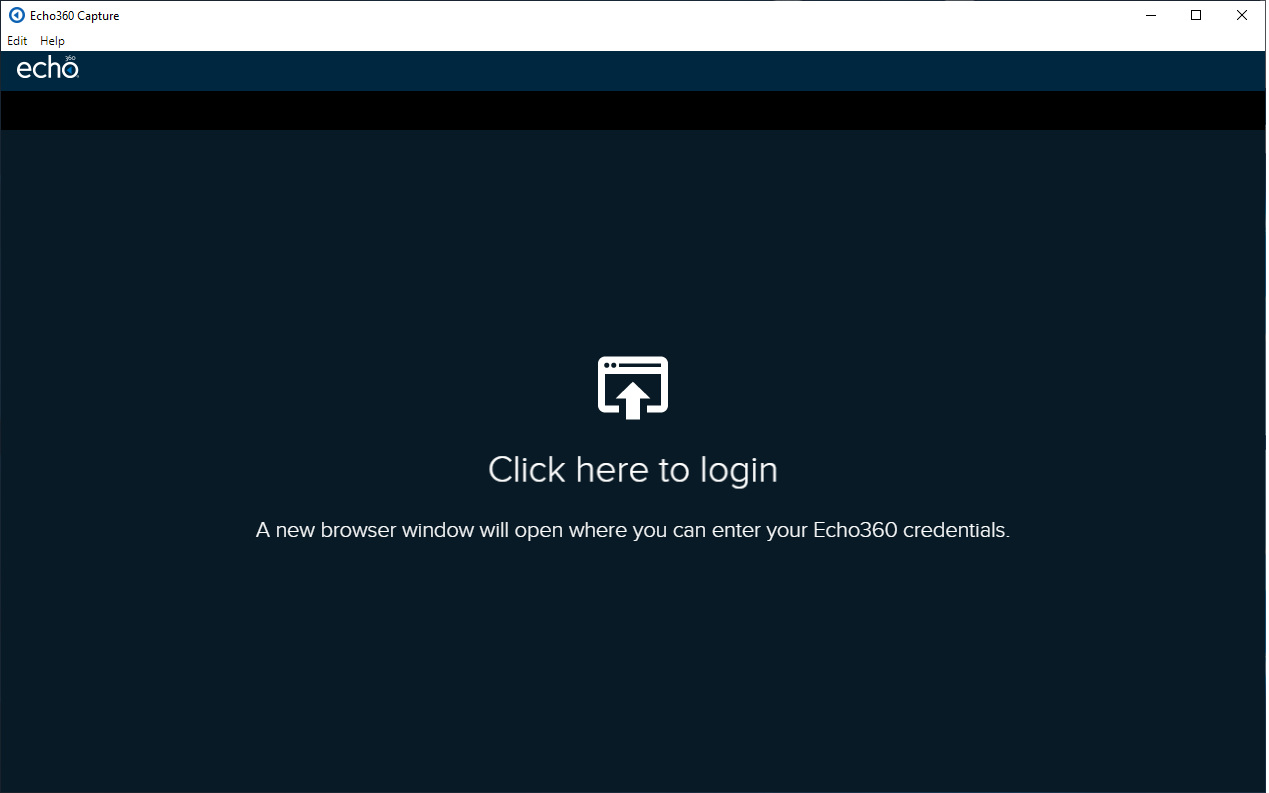
- Load Universal Capture via the desktop icon and login by clicking in the middle of the screen:
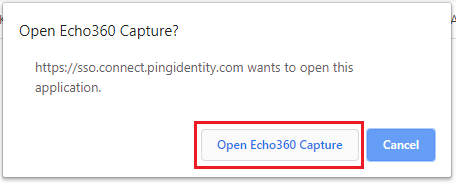
- You will now need to click on ‘Open Echo360 Capture’ and then you will be directed to login to Echo360 via the ID checker.
- Now you’re logged in, please select which microphone, computer screen display and camera you would like to use via the options shown in the screenshot below:

- To start a recording, simply click the red Record button. You will see a 5 second count-down and then the capture will begin. When taking a break, you can pause the recording or if you’ve finished your recording then click the Stop Button.
- Once the recording has been processed, it will appear under the ‘My Content’ tab when you login to https://echo360.org.uk.
- Load Universal Capture via the desktop icon and login by clicking in the middle of the screen:
Publishing directly to the module’s Q-Review section and enabling live-streaming
If you would like to publish your recording straight to the module’s Q-Review section so that it is available via the Q-Review link in QMplus (also possible as a live stream), then this can be done via the pencil icon in the top left of the screen: 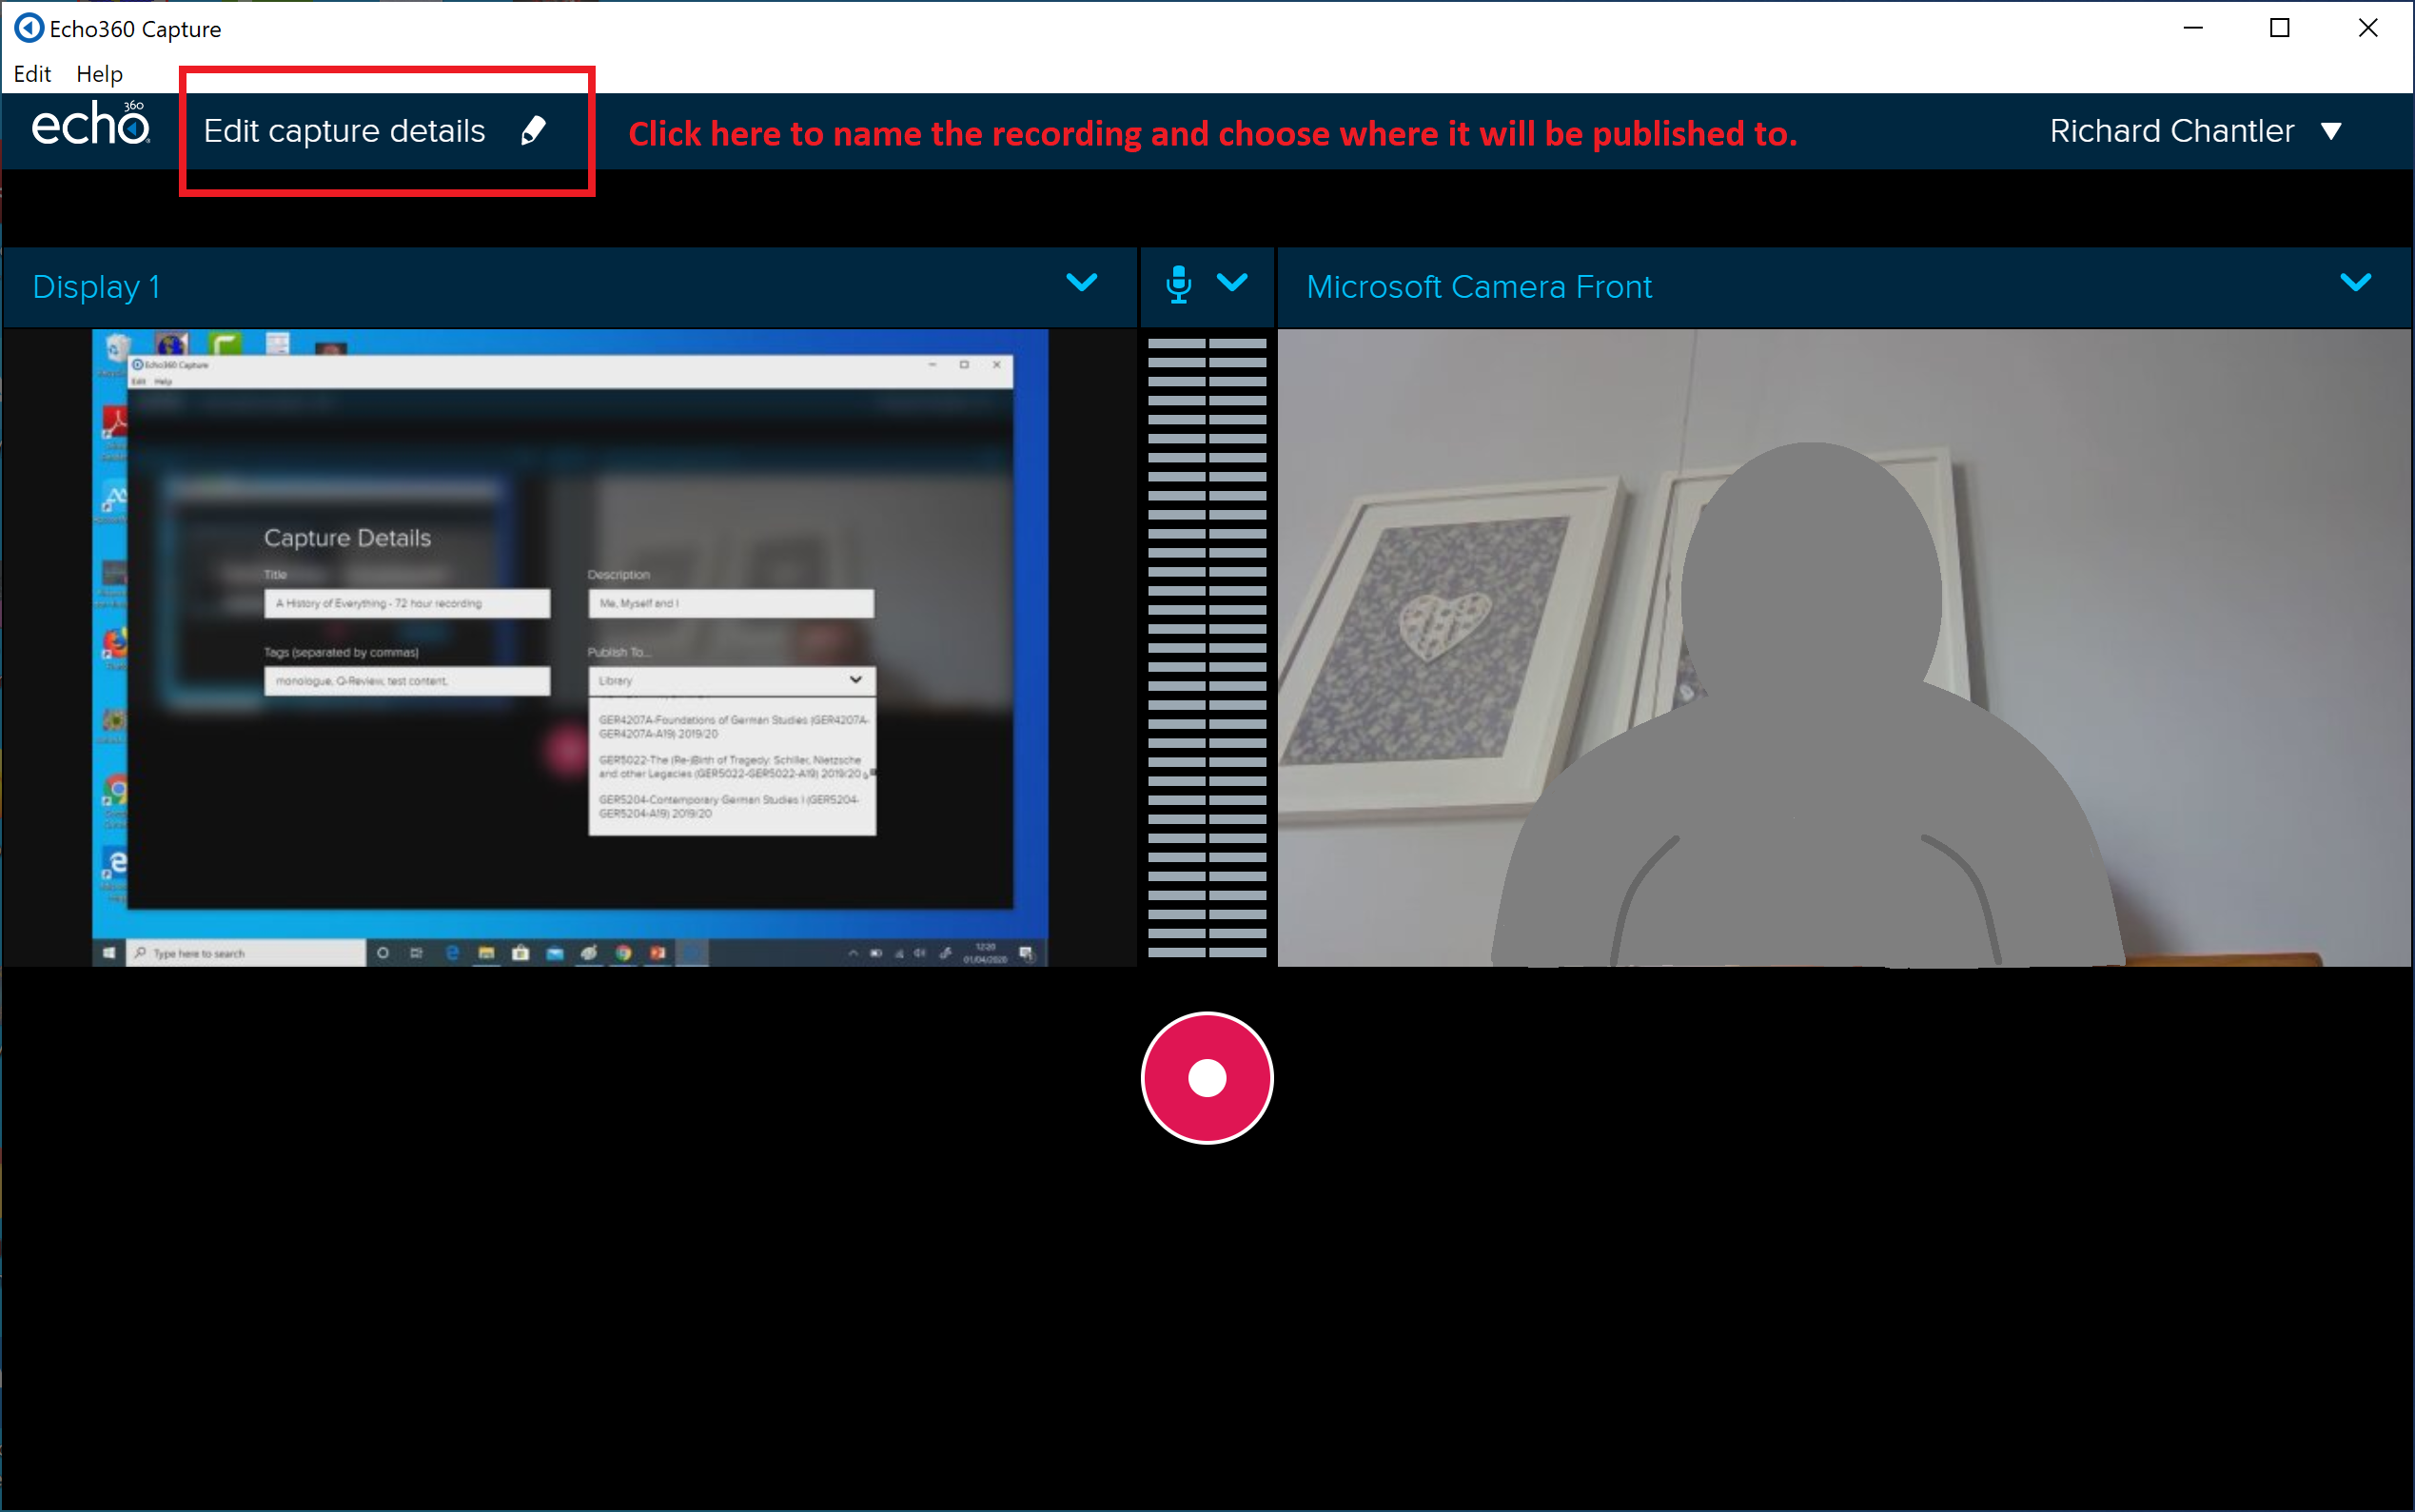
Then complete the fields and choose the module from the list on the right hand side. 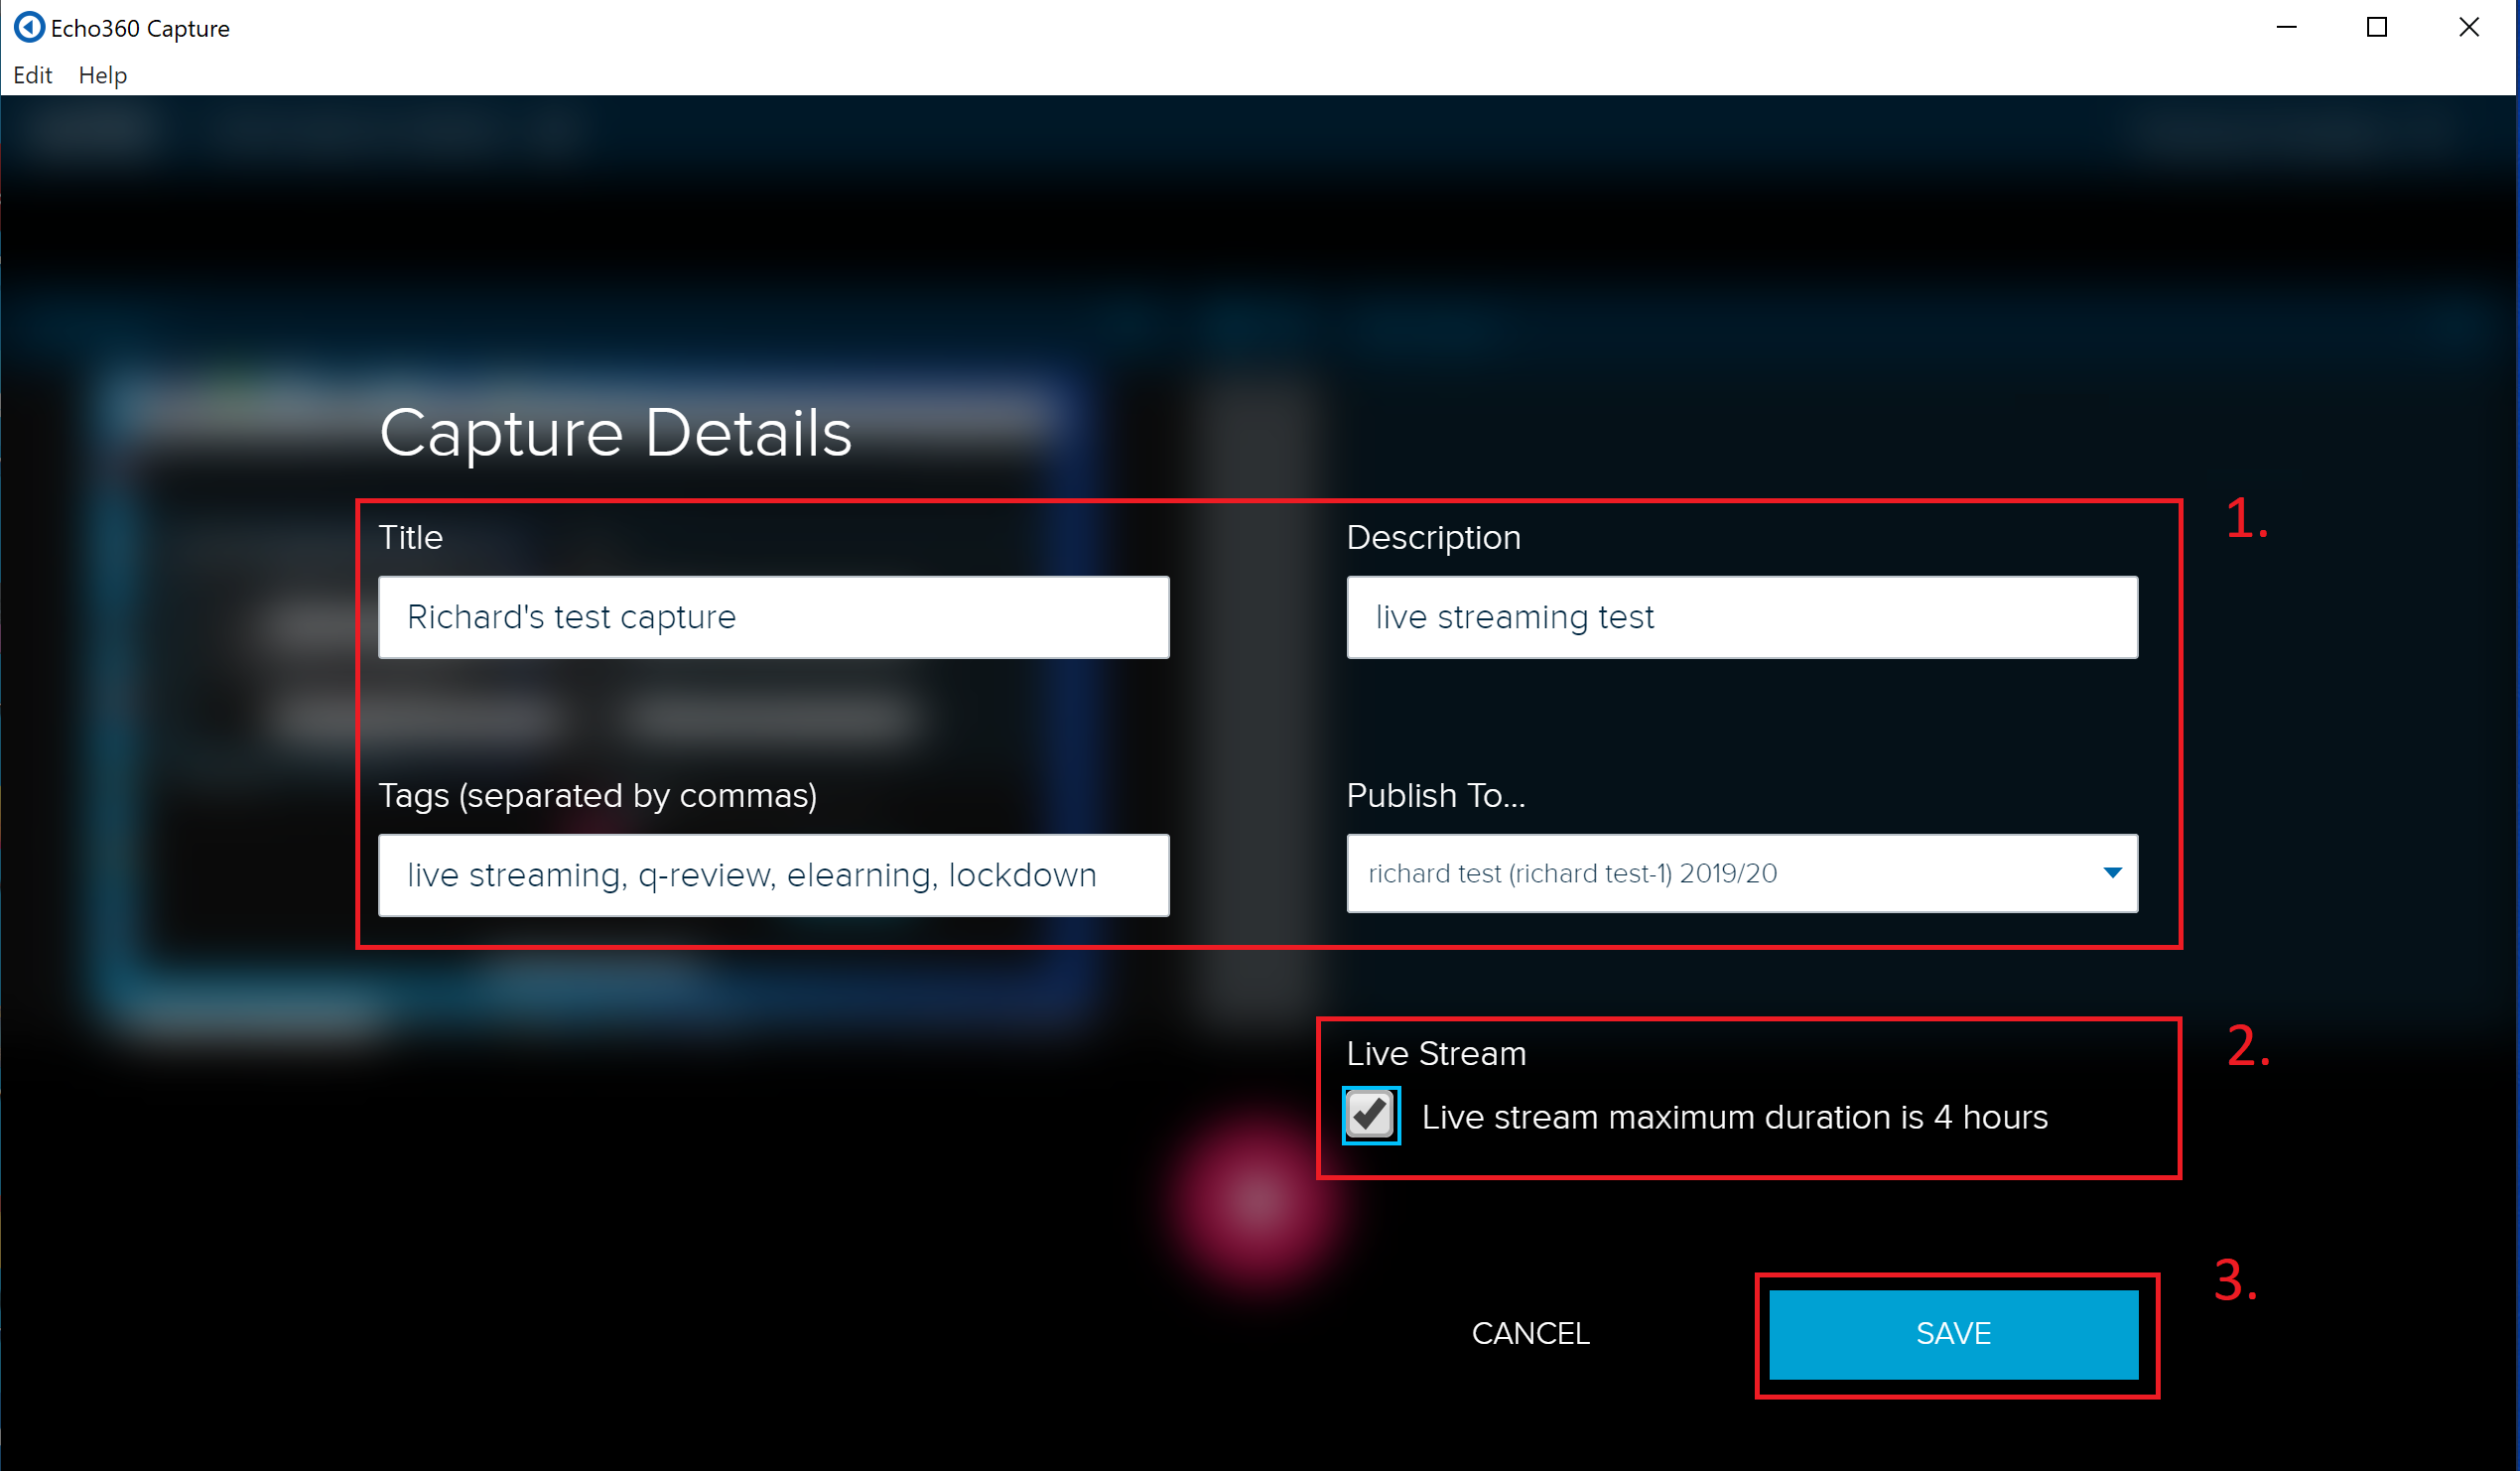
One can choose whether the recording is published to your media library, so that you can edit it, configure the availability of it, etc – or one can choose a module to publish to. The recording will be processed and available to view in approximately the same amount of time that the recording is in length (a 1 hour recording should be available in under an hour).
Alternatively, the ‘live stream’ option can be enabled and the recording will be shown live via the Q-Review link in QMplus (once the start recording button has been clicked upon).
If the Q-Review section doesn’t appear as an option, click through the Q-Review link in QMplus for that particular module and the option will then appear. (By clicking through the Q-Review link, you will be added as an instructor to the Q-Review section in Echo360).
Did this answer your query? If not, you can raise a ticket on the online Helpdesk or email: its-helpdesk@qmul.ac.uk . Alternatively you can also request a particular guide or highlight an error in this guide using our guides request tracker.
Produced by the the Technology Enhanced Learning Team at Queen Mary University of London.
Related items
