
Working with breakout rooms in Zoom

For: StaffApplication: ZoomTagged: web conferencing , zoom
Breakout rooms allow you to divide meeting participants into separate sessions which can be used for small group activities or discussions. As meeting host, you have full control over the number of rooms created, who can join each room, how long the breakout sessions will last, and have the ability to move between rooms at any time.
This is an excellent feature for adding collaborative elements to online classes or webinars, particularly with a large number of attendees where facilitating meaningful interactions can be challenging. Breakout rooms can also give participants access to features which may be restricted in the main room, such as their microphone, camera, and screen sharing.
Like any group activity, it can be helpful to plan breakout activities in advance. For example, you may want to consider:
-
- number of participants per group
- timings for the breakout activity
- clear instructions for the activity
- materials participants may need to work on
- expected outputs and whether participants will report back to the main room
- assigning roles during the breakout session to ensure activities run smoothly
This guide covers:
Creating breakout groups
Ad-hoc breakout groups can be created quickly during a meeting, or you can create groups with specific participants in advance by configuring the meeting settings in your Zoom account.
To initiate a breakout session during a meeting, start by clicking the Breakout Rooms button at the bottom of the window.

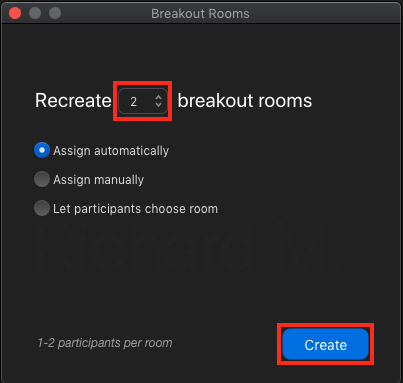
Use the Breakout Rooms window to specify the number of rooms using the drop-down menu. You can then assign participants automatically (random allocation), manually (not recommended for large groups), or let participants choose their own groups. Once configured, click Create.
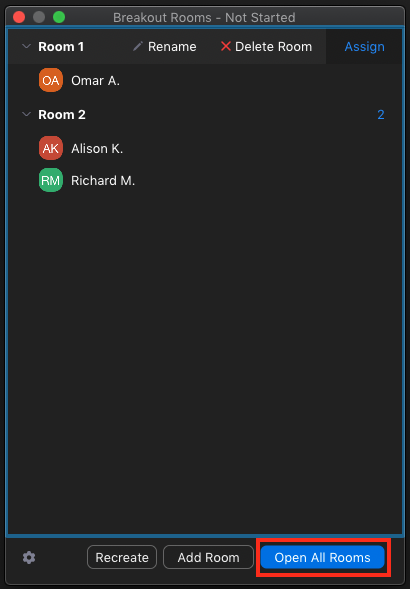
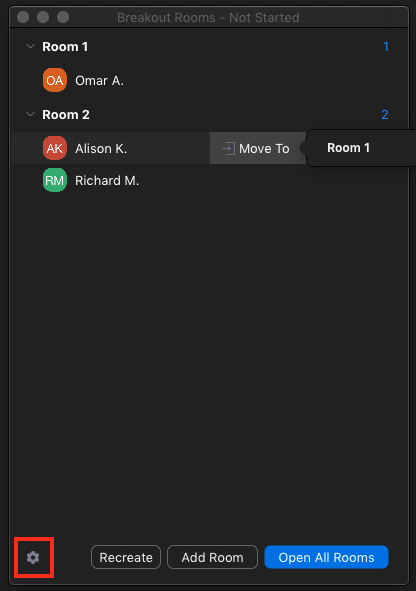
You will be presented with a window previewing the rooms and which participants will be allocated to each. From this window you can rename or delete a room, assign additional participants to a room, move participants between rooms, and use the Add Room button to create additional breakout rooms. To move a participant, hover your cursor over their name, click Move and select the desired room.
If you would like to adjust the settings for the breakout session, click the ‘Cog’ icon at the bottom of the window.
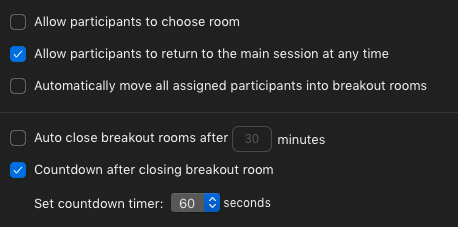
This allows you to specify whether participants can move between rooms, automatically end the breakout session after a set amount of time, or adjust the countdown timer when manually ending a session.
Once you are ready to start the breakout session, click Open All Rooms. See the ‘Managing breakout sessions’ section below for information on running a breakout session.
Configure breakout rooms in advance
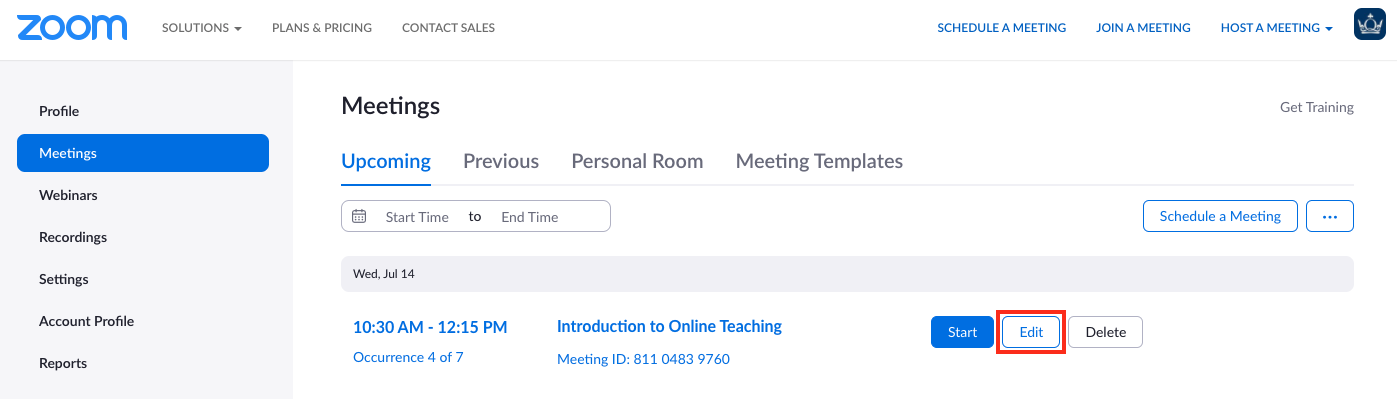
To create breakout rooms with specific users in advance of your meeting, first to your Zoom account, locate your scheduled meeting and click edit.
This can also be done during the initial meeting setup. Click here to view our detailed guide on Scheduling a Meeting.
Under Meeting options, tick the box for Breakout Room pre-assign. This will allow you to create rooms manually using the + Create Rooms setting, or automatically using an Excel CSV import. Guidance for each method is outlined below.

When manually creating rooms, you will be presented with a window where you can click the + icon to add rooms. On the right side of the window, you can search the names or email addresses of the users you would like to register and add them to each room. Repeat these steps until all your rooms are configured and click Save.

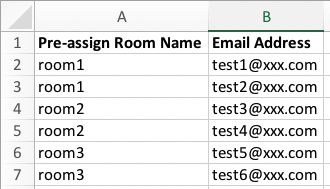
For larger groups, you may want to configure breakout rooms using a CSV Import. This allows you to use an Excel spreadsheet with participant email addresses to create rooms automatically. To get started, click the Import from CSV option. From the Import Rooms window, you can download a template file which already contains the required format.
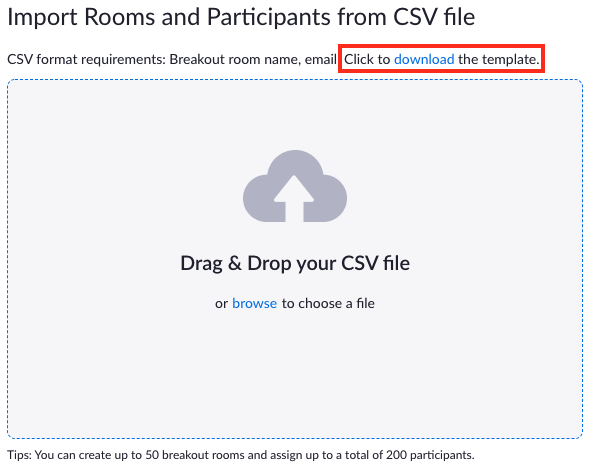
Simply add the email addresses of your participants (this must match the email address they are using to log in to your meeting) and type the room name in the corresponding column. When ready, save the file and upload it using the Import Rooms window.
Important Note: Only participants who enter the meeting with the email address registered in the pre-assigned breakout room will be allocated to the correct room when the breakout session begins. Students need to join the Zoom session using their QMUL email addresses to be automatically allocated to the correct room. Anyone connecting as a Guest, using an external email address, or registered users who join late after the breakout has started, must be manually allocated to a breakout room during the meeting.
Managing breakout sessions
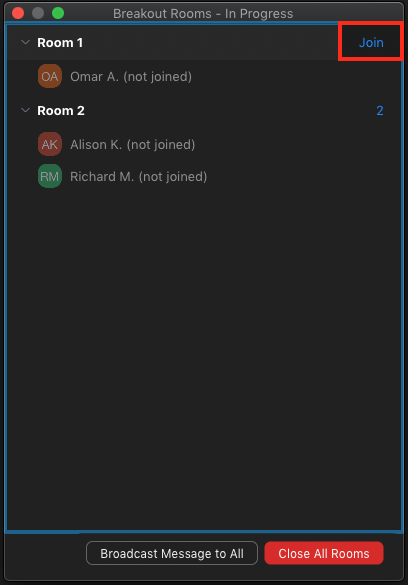
Once the breakout rooms have been opened, there are several actions you can take to manage the session. You (or any Co-Hosts) may want to move between the rooms to check on participant discussions or answer any questions. Hover your cursor over a room and click Join. This will refresh your Zoom meeting window and move you into the breakout room. You can move between any of the breakout rooms and the main meeting room at any time.
You can also use the breakout rooms window to Broadcast a message or end the breakout session.
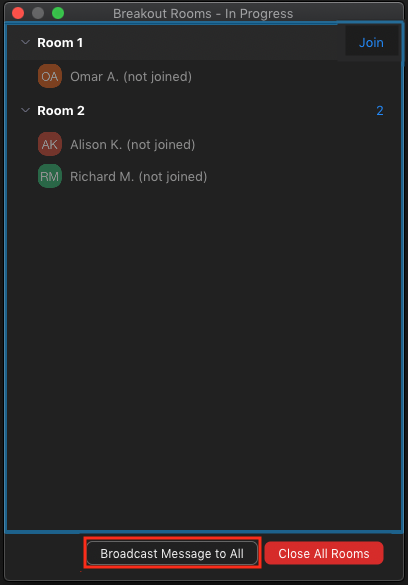
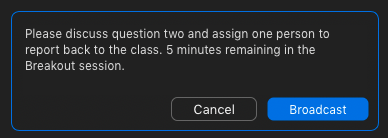
Broadcasting a message is an easy way to communicate with all participants without moving between each room manually. Using the breakout rooms window, click Broadcast Message to All to open a text field. Enter your message and click Broadcast to have the message temporarily appear in each of the separate breakout rooms for participants.
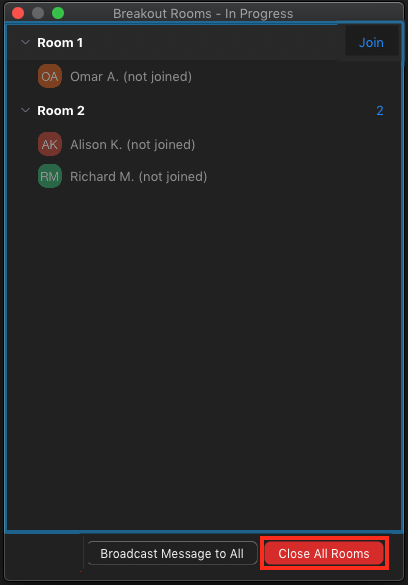
When you are ready to end the breakout session, click Close All Rooms to recall participants back to the main meeting room. Depending on your meeting settings, participants can choose to return immediately, or will automatically return to the main room once a countdown timer ends.
Participants will be presented with the following message:
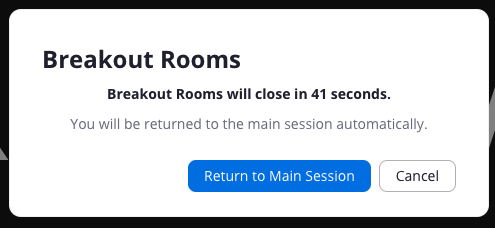
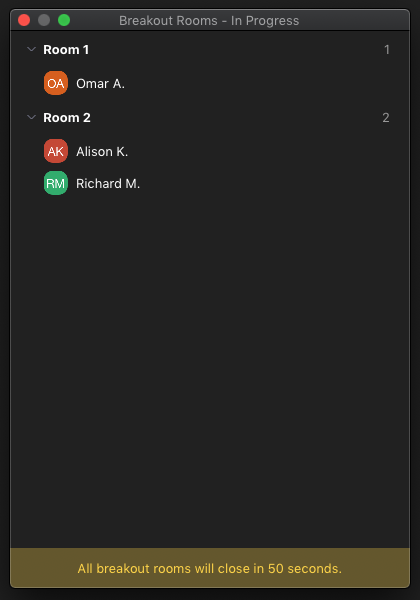
You can also view the time remaining on the countdown timer in the breakout room window.
Tips for running breakout rooms
- Be sure to share any required files, communicate tasks, and assign roles prior to opening the breakout rooms. Users may be confused about what to do once leaving the main room if instructions are not clear. You are unable to share your screen to all groups once breakouts begin.
- Note that if you are recording the meeting, the recording will continue to capture activity in the main room during breakout sessions. If you need to have discussions with other co-hosts, ensure you pause the recording. Breakout rooms are not automatically recorded, and breakout room recordings will appear as separate files from the main meeting recording. Recording breakout rooms follows the same steps as recording a meeting. Click here to view details information on recording in Zoom.
- Participants who join late, after the breakout session has started, will need to be manually allocated to a breakout room.
- You can manually re-assign or move students between rooms at any time.
- Co-hosts can move between rooms and assign participants to rooms. If you have a large number of participants, additional facilitators can be helpful for assigning users to rooms and moderating discussions.
Did this answer your query? If not, you can raise a ticket on the online Helpdesk or email: its-helpdesk@qmul.ac.uk . Alternatively you can also request a particular guide or highlight an error in this guide using our guides request tracker.
Produced by the the Technology Enhanced Learning Team at Queen Mary University of London.
Related items
