
*An overview of Zoom*

For: StaffApplication: ZoomTagged: overview , web conferencing , zoom
Zoom is an enterprise video conferencing platform for facilitating online meetings, webinars and teaching. Sessions can be started by simply sharing a meeting link with attendees. This platform became popular for its ease of use, high quality audio and video experience, and the ability to view a large number of participants during a session. Zoom provides extensive configuration to meet specific teaching needs, and has a variety of features for interaction, such as polling, breakout rooms, and a collaborative digital whiteboard. Unlike personal video conferencing applications, Zoom provides session hosts with controls to manage all aspects of a session and determine which features will be made available to participants.
This guide covers:
The main features of Zoom
- Audio and video conferencing with a large number of participants
- Text chat, allowing participants to interact, ask questions, send private messages, and share files. This is particularly useful for meetings where attendees are restricted from sharing audio or video.
- Screen sharing, allowing the broadcast of your desktop screen, just a specific application (like PowerPoint or your web browser), or a mobile device (iOS only). Remote control also allows you to temporarily grant control of your PC to another participant – useful for joint presentations.
- Digital whiteboard that can be collaboratively edited by participants
- Annotation tool – meeting participants can add annotations while screen sharing as a viewer or the one that started sharing their screen. You can also use annotation tools when sharing or viewing a whiteboard.
- Polling – quickly create multiple choice polls for participants
- Meeting recording, both local files and cloud storage, with pause and resume functionality. Cloud recordings will be automatically transferred to your QMplus Media account.
- Breakout rooms to divide participants into smaller groups. During breakout sessions, participants can be granted features that may not be permitted in the main room, such as the ability to share audio, video, or screens. Breakout groups can be randomly generated, or registered participants may be pre-assigned to specific rooms in advance. Note: Breakout sessions are not captured by the main meeting recording.
- Reactions allow participants to visually communicate with the Host, with options such as ‘Raise Hand’ to indicate a question, ‘yes’ and ‘no’ for quick responses, and ‘speed up’ and ‘slow down’ to help manage the pace of the session.
- Closed captioning and transcripts – Zoom has several options for generating text for online meetings. Zoom can generate live ‘machine-generated’ captions during a session. Transcripts can be made available alongside a cloud recording, allowing viewers to search for keywords from the session. A transcript from the Chat discussion can also be provided – helpful for viewing questions or comments which may not be accessible in the recording audio. Click here to view our detailed guide.
- User roles – each session can have a primary Host, Co-Hosts, and Participants, each with different permissions. This is particularly useful for large sessions where you may not want attendees to have full access to audio, video, or screen sharing features. Hosts can promote specific Participants to Co-Hosts to quickly grant additional functionality (i.e., for student presentations or Q&A sessions).
- Security menu to quickly manage any malicious or undesired activity during a meeting. This menu allows the Host to restrict participant access to features, lock meeting functions, and immediately suspend all activity in case of emergency. There are also a number of security features available in your Zoom profile to prevent unwanted users from accessing meetings or recordings.
Getting started with Zoom at QMUL
Even if you are already familiar with Zoom, there are specific steps required to access your QMUL account.
Please note: if your Zoom desktop client is logged in with a personal or external account when opening a meeting link, this may restrict your ability to host or manage QMUL sessions.
Download Zoom
- Navigate to the Zoom Downloads page and click ‘Download’ under the Zoom Client for Meetings heading
- Open the Zoom installer file and follow the on-screen prompts to install the application (this may require Administrator privileges on your PC)
- Alternatively, the first time you attempt to join a Zoom meeting on your PC, you will be prompted to download and install the Zoom Client
- Note: Zoom can be used via your web browser, but this is not recommended for hosting meetings as it may restrict access to some features
- For mobile devices, the Zoom app can be installed via the iOS App Store and Google Play store
Sign in to Zoom
Using a web browser, navigate to qmul-ac-uk.zoom.us.
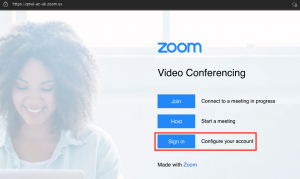
Click Sign in and follow the prompts to enter your QMUL account credentials.
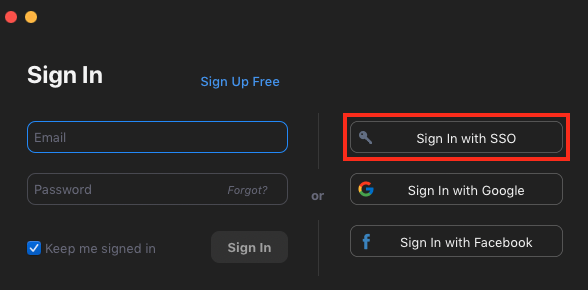
When signing in to the standard Zoom website (zoom.us), desktop client or mobile apps, follow these steps:
Do not enter your email address and password, instead, select Sign in with SSO.
In the Domain field enter ‘qmul-ac-uk’.
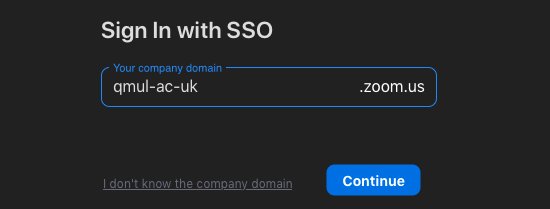
Follow the prompts to access your QMUL account.
Switching accounts on the Desktop Client
If you need to switch between personal or external accounts and your QMUL account, follow the steps below after opening the Zoom Desktop Client:
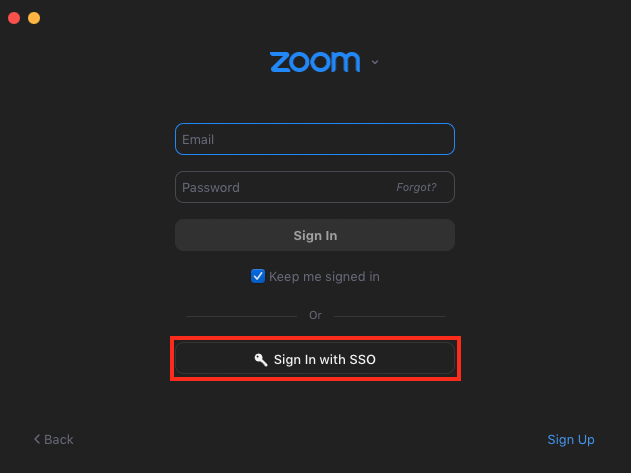
With the Zoom window open, click profile menu in the top-right corner (this should display your profile image or initials) and select Switch Account.

At the login screen, select Sign in with SSO.
If your browser is already logged in with your QMUL account, the account switch may happen instantly. If not, follow the on-screen prompts to log in to your QMUL account. Once completed, you can open the profile menu again to confirm that you are logged in with your QMUL email address.

For further guidance or support when accessing your QMUL account, please contact IT Services.
Personal Meeting ID (Meet instantly)
With Zoom you can schedule meetings in advance or meet instantly using your Personal Meeting ID (PMI) and meeting link. Your PMI is a persistent meeting code and meeting link, which can always be used by others to quickly join your personal meeting room. Simply share your PMI code or link (and the passcode if applicable) with any attendees.
Accessing your Personal Meeting ID from the Zoom website
From the Zoom website, sign in to your account.

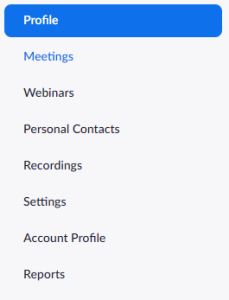
On the left side menu, select Profile.
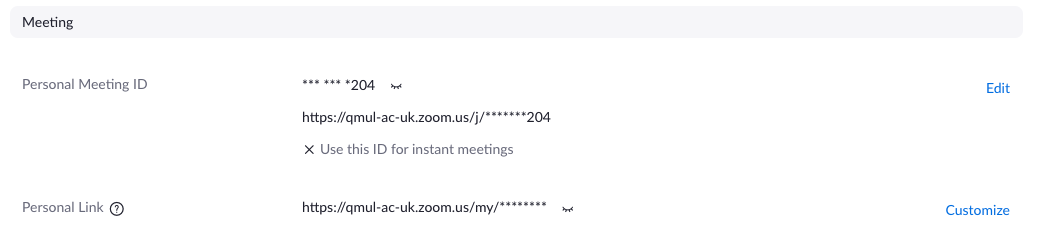
Scroll down to the Meeting heading to view your Personal Meeting ID and Personal Link.
Accessing your Personal Meeting ID from the Zoom desktop client
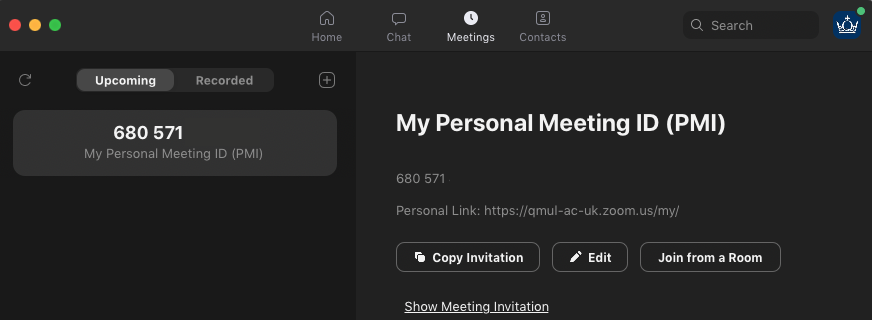
From the Desktop Client, click the Meetings tab and your Personal Meeting information will be displayed.
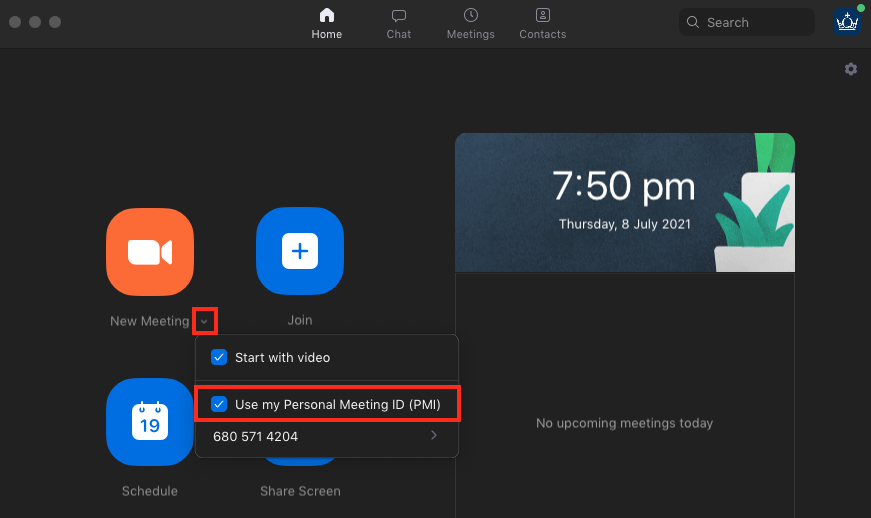
If you regularly use this feature for meetings, open the Desktop Client, click the small arrow icon beside New Meeting. Tick the box which states Use my Personal Meeting ID (PMI), and each time you click the New Meeting button you will automatically enter your Personal Meeting room.
Scheduling meetings in advance
You may want to schedule a session with custom settings for a specific group of users in advance. This may be a teaching session, a meeting with colleagues, or an online presentation.
- Open a web browser and sign in to your Zoom account
- Select the Meetings link and click Schedule a Meeting
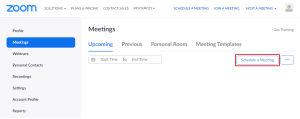
- Configure the date, time, and details for the meeting and click Save
- From the confirmation page, you can share the joining link and passcode with attendees via email, QMplus, or other preferred method
- Meeting can also be scheduled directly in QMplus using the External tool activity.
See our scheduling guide for a details on scheduling within QMplus and your Zoom account.
Test your audio (Speakers and microphones)
Before your first meeting, ensure your audio and video devices are tested and working as expected. Follow the steps below to test your speaker and microphone, and preview your camera:
When first joining a meeting, you may be prompted to Join Audio. Clicking this option will open a window where you can tick a box to always Automatically join audio by computer when joining a meeting.
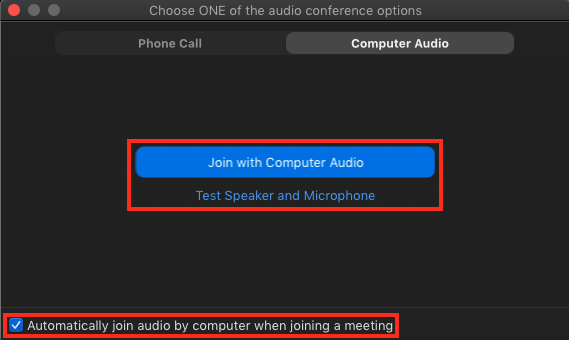
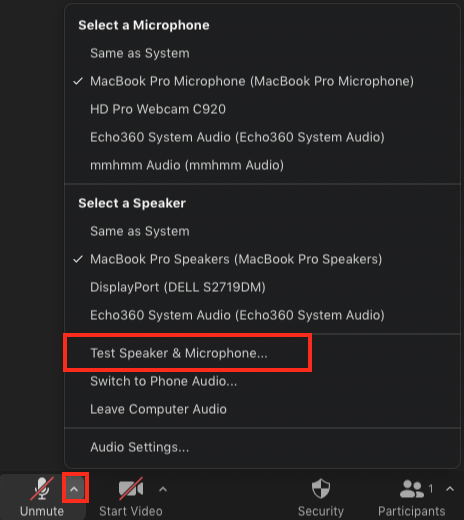
There will also be an option to Test Speaker and microphone – this will step you through Zoom’s audio setup options. If you are not presented with this window, click the ‘arrow’ icon beside the Mute/Unmute button at the bottom of the window and select Test Speaker & Microphone from the menu.
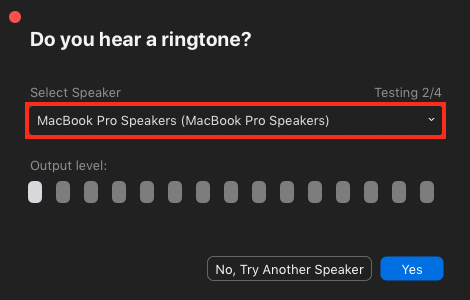
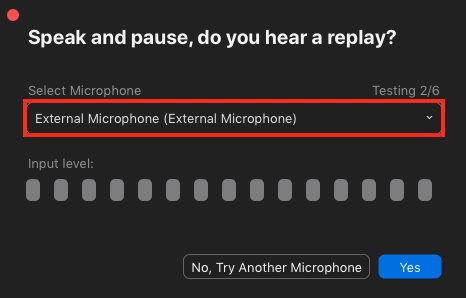
The speaker test will play a sound – select yes or no depending on whether you hear the tone. Consider where the tone was played (i.e., from headphones or connected speakers) and use the Select Speaker menu to choose a different device if required.
The next window will prompt you to speak into your microphone, playing back your voice with a short delay. This allows you to hear a preview from your audio device. If you are unable to hear your voice or if the audio sounds like it is coming from the wrong microphone (i.e., a laptop microphone rather than a headset), use the Select Microphone menu to select the correct device and test again. Once satisfied with the audio quality, click Yes to end the test.
Manage and download recordings
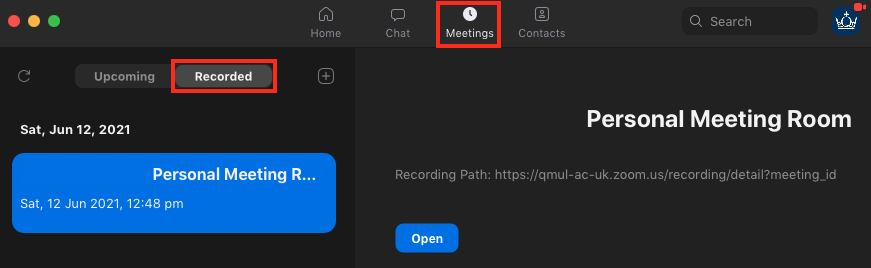
Meeting recordings can be stored locally on your computer or using the Zoom Cloud online. To manage recordings with the Zoom Desktop Client, click Meetings, and select the Recorded tab. Select the recording you would like to view and click open. Cloud recordings will be automatically transferred to your QMplus Media account.
Recordings can also be managed and shared from your Zoom account, by clicking the Recordings link from the menu.
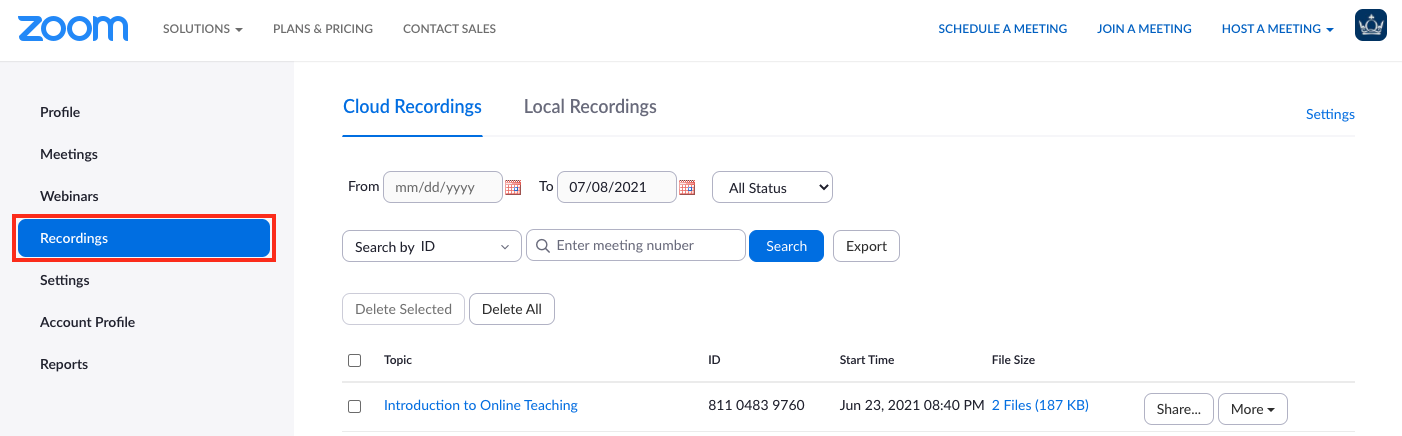
You may need to use the Dates Filter or Search field at the top of the page to locate a specific recording.
More information on how to manage and share recordings is available on this page.
Technical Requirements
Zoom requires a Windows PC, Mac, or modern mobile device, stable internet connection, microphone, and camera. Meetings can be joined using the Desktop Client, Mobile App, or updated web browser (not recommended for hosting meetings).
For detailed more information, please see our technical requirements guide or the Zoom website.
Find out more
- Join a session with the TELT
- Try it out – create an ad-hoc meeting or practice with a colleague
- Have a look at some of our guides
- Browse official Zoom documentation
Did this answer your query? If not, you can raise a ticket on the online Helpdesk or email: its-helpdesk@qmul.ac.uk . Alternatively you can also request a particular guide or highlight an error in this guide using our guides request tracker.
Produced by the the Technology Enhanced Learning Team at Queen Mary University of London.
Related items
