
Managing and Editing Teams Recordings

For: StaffApplication: MS TeamsTagged: Microsoft Teams , web conferencing
Teams provides the ability to record your online meetings. This can be particularly useful for sharing meeting recordings with those unable to attend live, to archive teaching content for future use, or to allow participants to review previous meeting discussions. Recordings are automatically uploaded to your QMUL OneDrive account, where they can be managed and shared. You can also download Teams recordings and upload the files into QMplus Media, allowing you to add a meeting recording to a QMplus area for students.
This guide covers:
Recording a meeting
To start recording during a meeting, click the ‘…’ More actions button at the top of the meeting window and select Start recording.
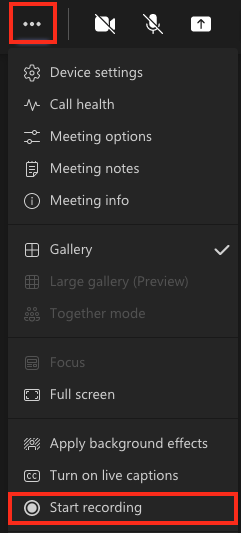
At the top of the meeting window, a notification will appear confirming that the recording has started, which notifies participants that their interactions in the meeting may be captured by the recording. You will also see a recording symbol and the length of the recording at the top-left corner of the meeting window.

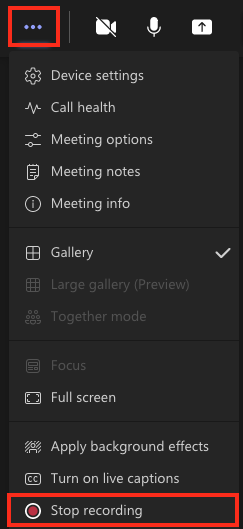
When you are ready to end the recording, click the ‘…’ More actions button at the top of the meeting window and select Stop recording.
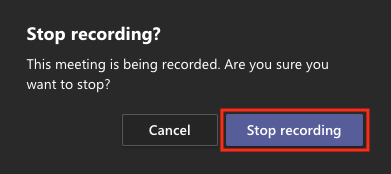
A confirmation pop-up will appear asking you to confirm whether you would like the recording to end. Click Stop recording to confirm.
Accessing recordings
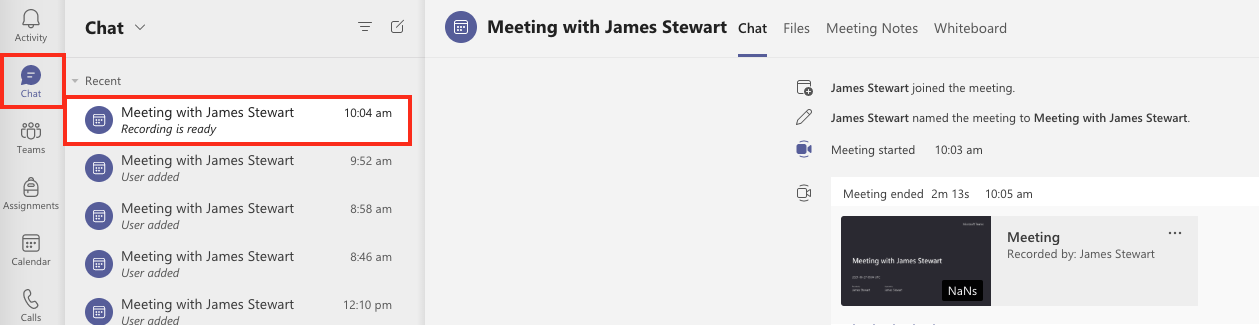
Once the meeting as ended, your recording will appear in the Chat panel in the main Teams window. Please note that depending on the length of the recording it could take some time for the recording to process and appear in the meeting chat.
To locate the recording, select the Chat panel, open the corresponding meeting from the chat list and the recording will appear in the chat window once processed.
Click the ‘…’ actions menu at the corner of the recording preview. From this menu you can copy a direct link to the recording by selecting Get link or you can select Open in OneDrive to manage the recording in your Office 365 account.

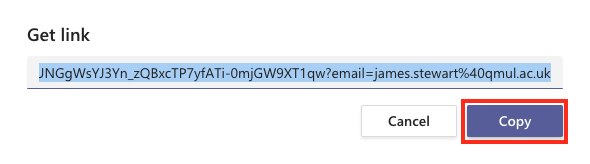
Selecting Get link will allow you to copy the direct link to the file to your clipboard, which can be shared with others. Click the Copy button under the URL to copy the link to your clipboard.
Selecting Open in OneDrive will open the Recordings folder in your Office 365 account where all Teams recordings will be automatically uploaded. You can access this folder at any time from OneDrive by clicking My files and opening the Recordings folder.
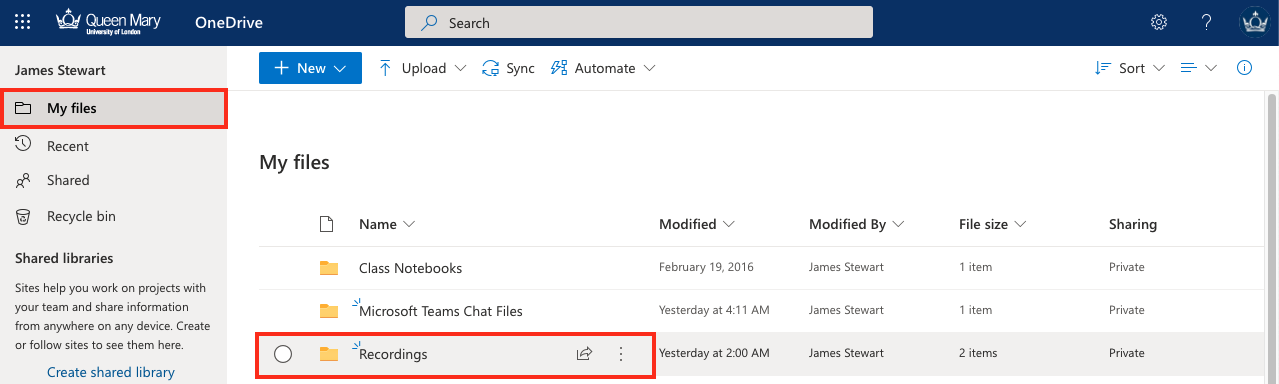
Click the circle icon beside relevant recording to Share, Copy a direct link, Download, or Delete the recording.
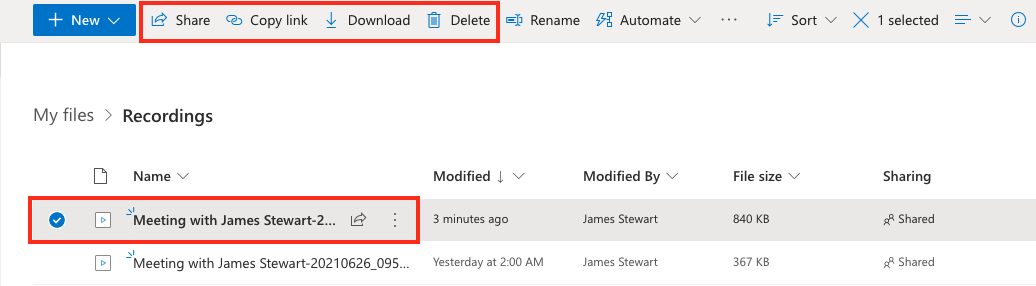
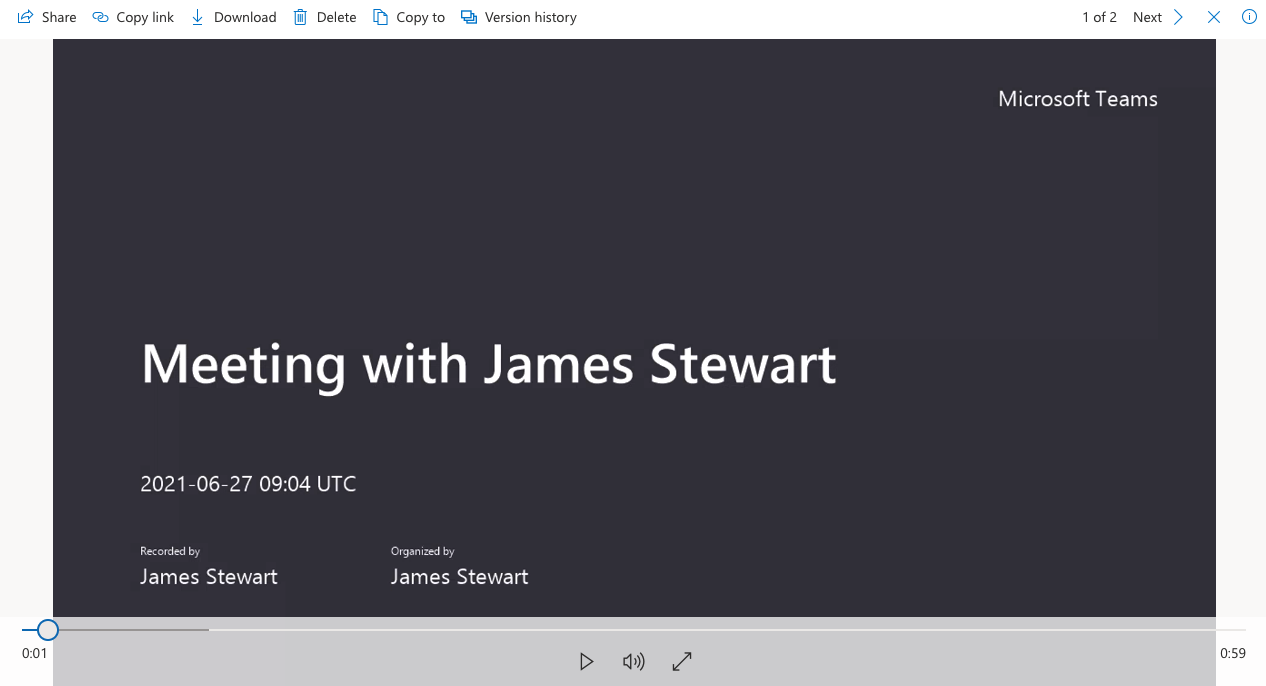
Click the title of the recording to watch the recording using the OneDrive video player.
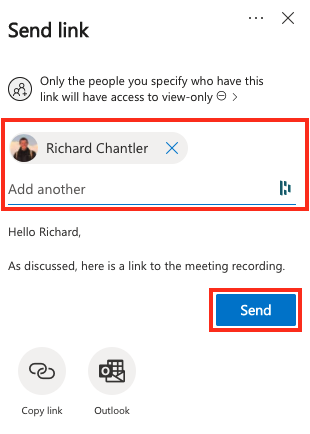
With the recording selected, click Share to provide access to the recording to other users. The Send link window will allow you to search users via name or email address. Once all relevant users have been added, click Send.
Manage Teams recordings in QMplus Media
You can manage and share downloaded Teams recordings in QMplus by uploading the recordings to your QMplus Media library. You can access your media library via the QMplus Dashboard using the My Media link, or you can log in to QMplus Media directly at this link.
Using the steps above to locate your recordings in OneDrive, select the relevant recording and click Download at the top of the page to save the file to your PC.
Access QMplus Media directly
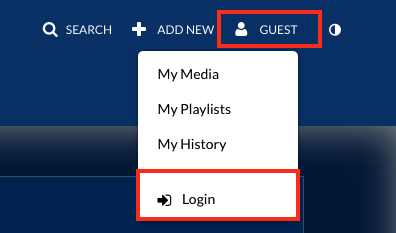
Open QMplus Media and click Guest at the top of the screen, click Login, and enter your username and password.
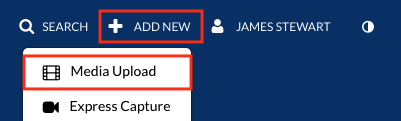
Once logged in, click + Add New at the top of the screen and select Media Upload.
Access QMplus Media via QMplus
Alternatively, you can also access QMplus Media via QMplus. Click the Dashboard icon at the top-right corner of the window.

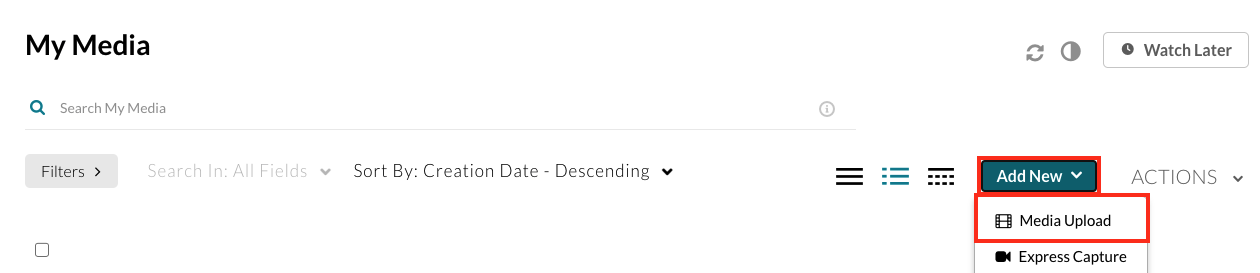
Select MyMedia from your Dashboard.

Click the Add New menu and select Media upload.
Upload recordings to your account
Before uploading files to QMplus Media, you must first accept the university’s copyright statement. Tick the box to agree and continue.

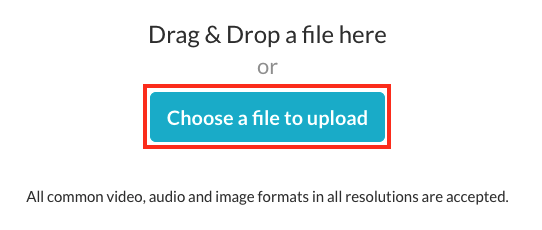
Either drag the file into your browser window or click Choose a file to upload to locate the file on your PC.
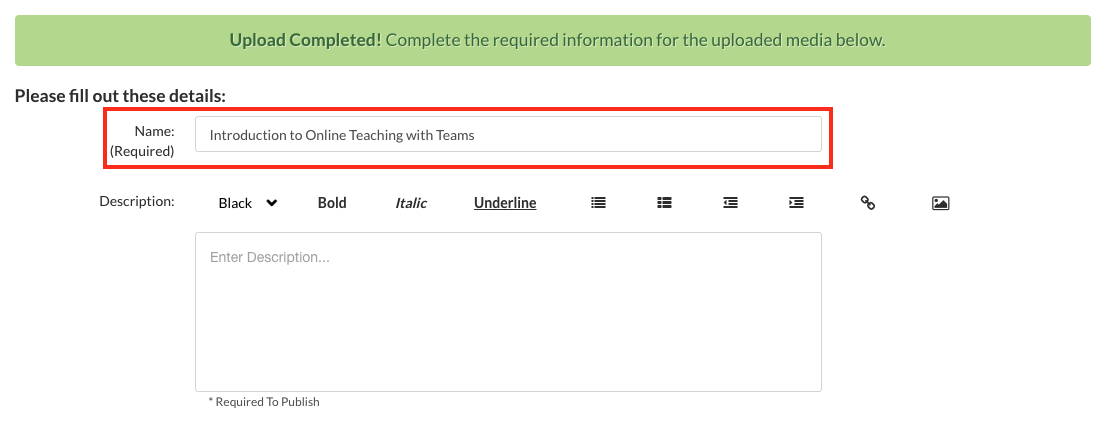
Once the recording has finished uploading, give the recording a name.
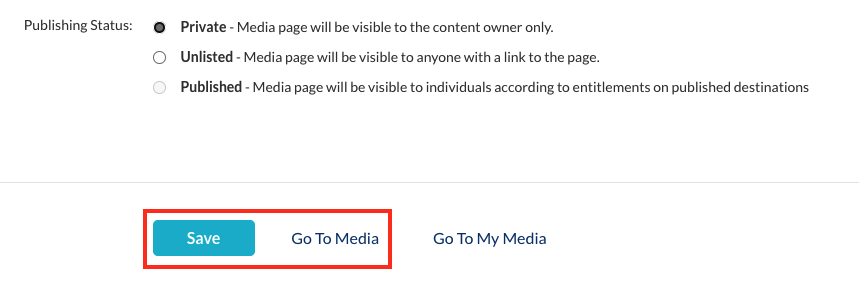
Scroll down to the bottom of the page and click Save to confirm any changes and then select Go To Media.
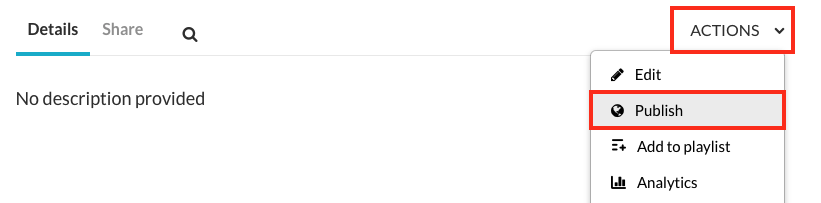
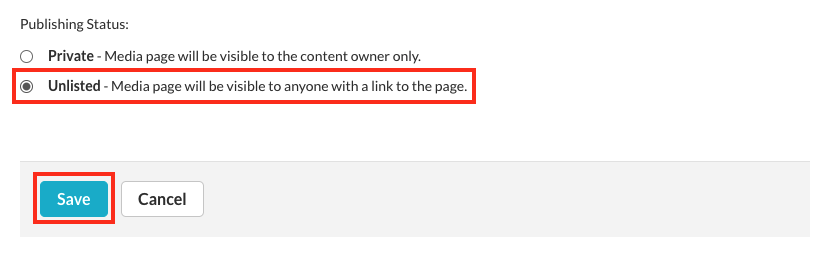
If you would like to share a direct link to the video in QMplus Media (which may take some time to finish processing), click the Actions menu and select Publish.
Select the button beside Unlisted and click Save to allow anyone with a shared link to view the recording.
When the page refreshes, click Share and copy the displayed link, which can be shared with potential viewers.

If you would like to securely embed your recording in a QMplus page, visible only to those enrolled on a module, view this guide for adding a QMplus Media video to a QMplus area.
Did this answer your query? If not, you can raise a ticket on the online Helpdesk or email: its-helpdesk@qmul.ac.uk . Alternatively you can also request a particular guide or highlight an error in this guide using our guides request tracker.
Produced by the the Technology Enhanced Learning Team at Queen Mary University of London.
Related items
