
Creating a portfolio page in QMplus Hub

For: Staff and StudentsApplication: QMplus HubTagged: page , portfolio , QMplus Hub
Every student and member of staff has their own personal QMplus Hub area and this can be used to store files, create a personal journal or blog, a CV and document tasks. Placing this content onto pages in QMplus Hub enables you to share any of this information with others. You can also share text, images, videos and audio. By default, your pages are only visible to you however you can choose to share your page with other QMplus Hub users or make the pages publicly visible. QMplus Hub pages can also be submitted as assignments in a QMplus course area.
This guide will take you through creating a QMplus Hub page and adding content to it. If you want to know how to share your page after you have created it, see our guide on Sharing with others in QMplus Hub.
This guide covers:
Creating a page
Note: All pages (apart from your profile page) created in your e-portfolio are personal to you until you choose to share them. Pages created in a group are visible to all members of the group.
Make sure you are logged in QMplus Hub. If you do not know how to access QMplus Hub, please see our guide on how to access QMplus Hub
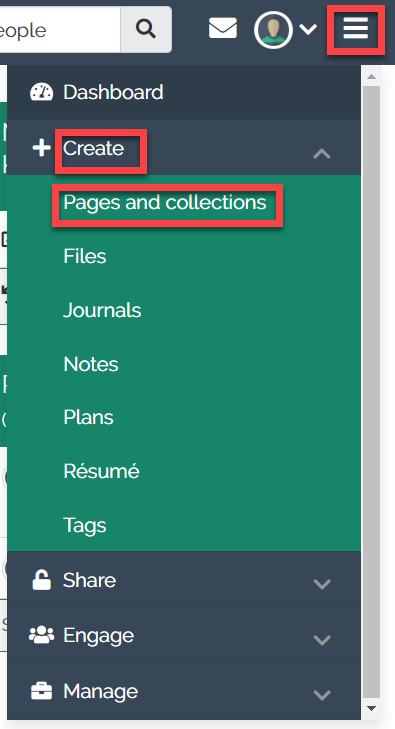
- Navigate to the main menu which is found at the top right hand side of the dashboard. From the Create drop down, select Pages and Collections.
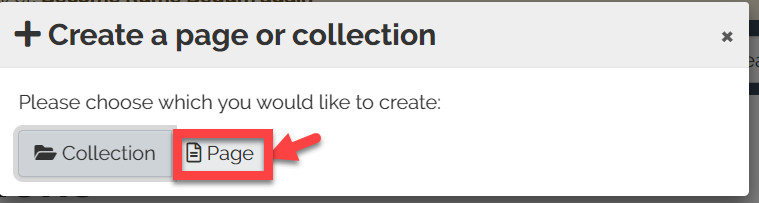
- To create a new page, click the Add option and then select Page. (Note: if you have already created pages they will be displayed here)

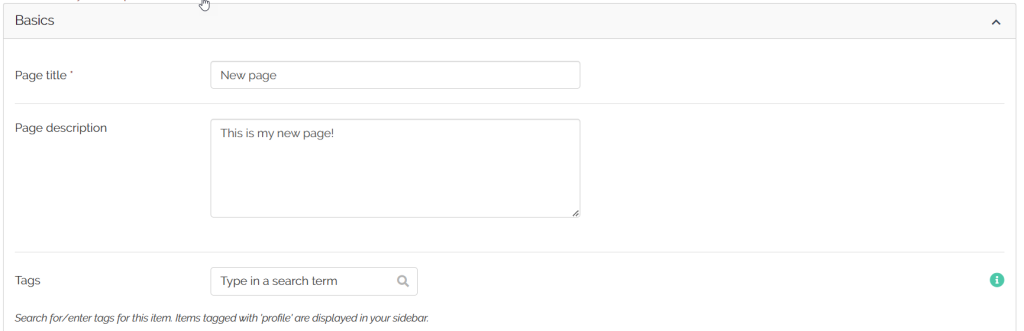
- In the page settings, you will notice the options have been divided into basic and advanced. As part of the basics option, you will see the following options:
- Page title – add the title of your page
- Page description – overview of what the page is about
- Tags -are keywords that you create and they can make searching for and displaying your content easier in QMplus Hub.
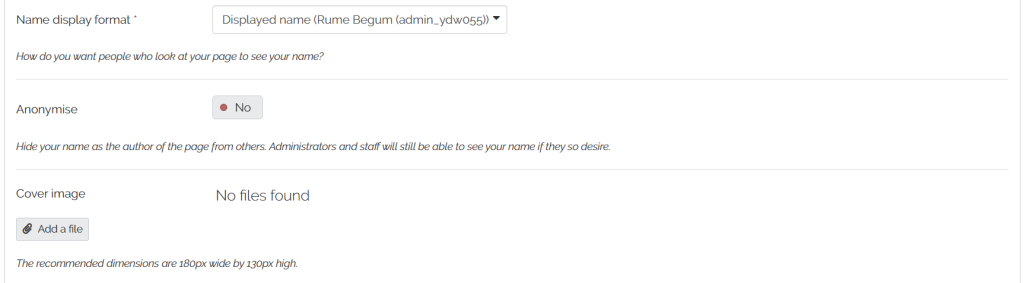
- Some of the advanced options are:
- Name display format – allows you to choose which format you would like your name to displayed to others who view your page
- Anonymise – allows you to hide your name
- Cover image – allows you to add a image to your page
- Once you are ready to view the page, click Save.

Adding content to your page
Once you have clicked save on the previous tab, you will automatically enter the edit content section. This is the area where you will be building your page.
You will notice there are several options available to you on the right hand side of the page.
- Drag to add a new block – to add content to your page, you can either drag this option to the page or click on the “+” icon.
- Settings – this will take you back to the page settings.
- Display page – this will display the page to show you how it looks when you share it with others.
- Share – this will allow you to share your page with other users of QMplus Hub.
- Return to pages and collections – this will take you back to your collection of portfolios.

Adding a text block
In this example, we will be adding a text block to the page.
- To add content to your page, drag and drop the + icon or click on it.

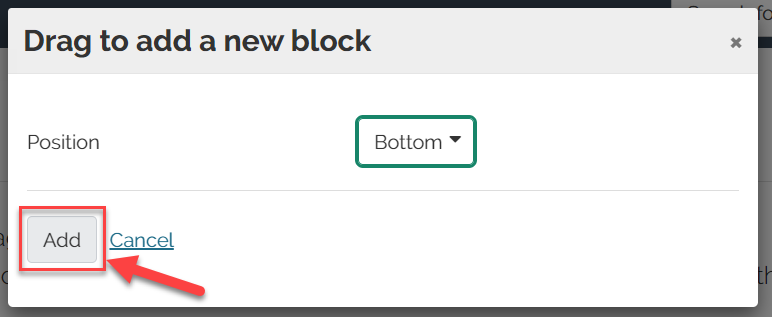
- From the drop down choose where you would like to position your block. It can either be placed at the bottom or the top of the page. Then click on the Add option.
- From the content type, select the text option.

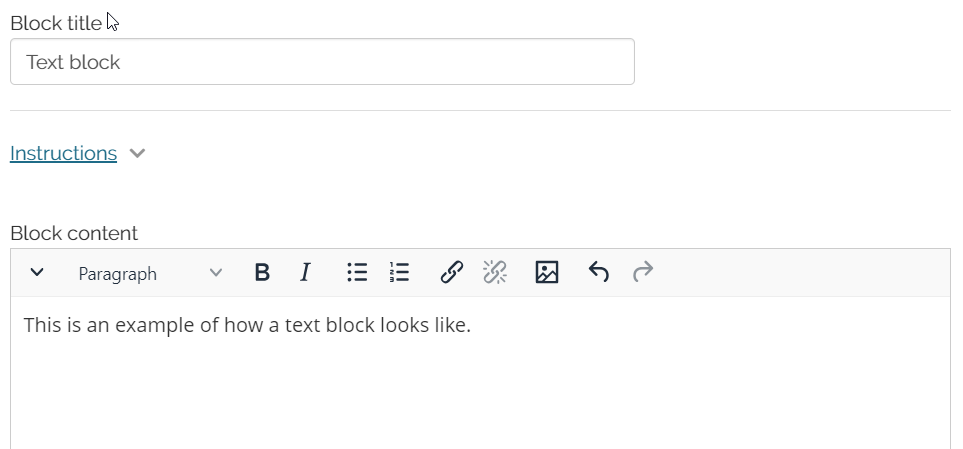
- You will be taken to another tab where you can give a title to your block, add instructions if required and add the content for the block.
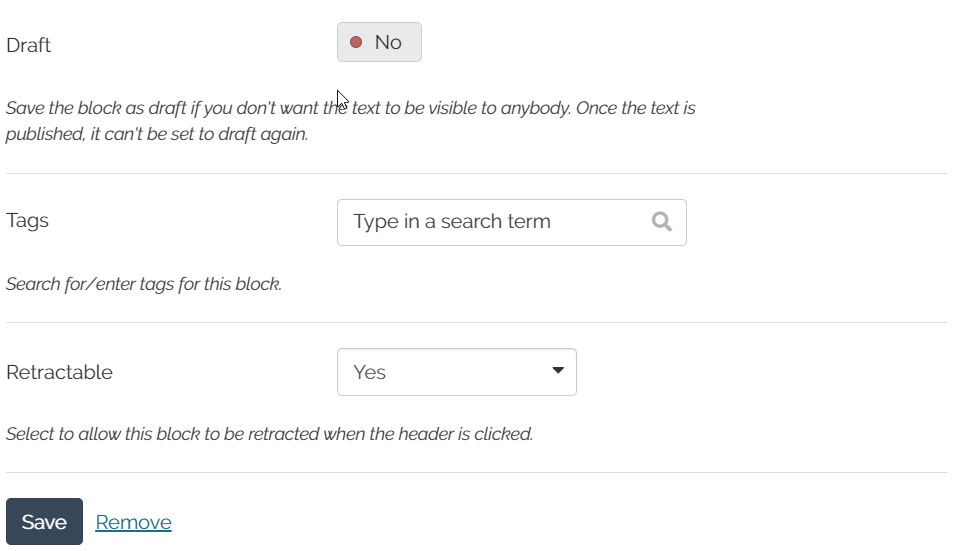
- You then have the option to save it as a draft, add a tag and choose whether the block should be retractable. Then click save.
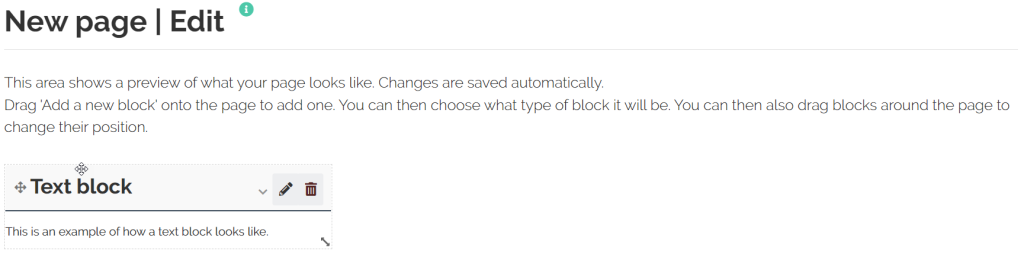
- You will now see the text block on your page. (Note: once you have added a block to a page, you can Edit it by clicking on the pencil icon or Delete it by clicking on the bin icon)
- There are several types of blocks that can be added to a page. More details of these block can be found here.
Did this answer your query? If not, you can raise a ticket on the online Helpdesk or email: its-helpdesk@qmul.ac.uk . Alternatively you can also request a particular guide or highlight an error in this guide using our guides request tracker.
Produced by the the Technology Enhanced Learning Team at Queen Mary University of London.
Related items
