
Emailing and Messaging Your Students
QMplus provides numerous ways for you to send messages to your students, including emails. This guide covers four ways for you to get in touch with your students through QMplus.
This guide covers:
- Use the ‘Module Announcements’
- Contacting students using the enrolments section
- The messaging interface
- Contacting students using the quickmail block
It assumes you know:
Module Announcements
Unlike a ‘forum’ which allows for a dialogue between staff and students and students and students, ‘Module announcements’ allows staff to post information to students but does not allow students to respond.
To post a message:
1. At the top of your module page click on Module announcement (if you do not see the Module announcement, please refer to the Add a Module Announcement Forum guide). 
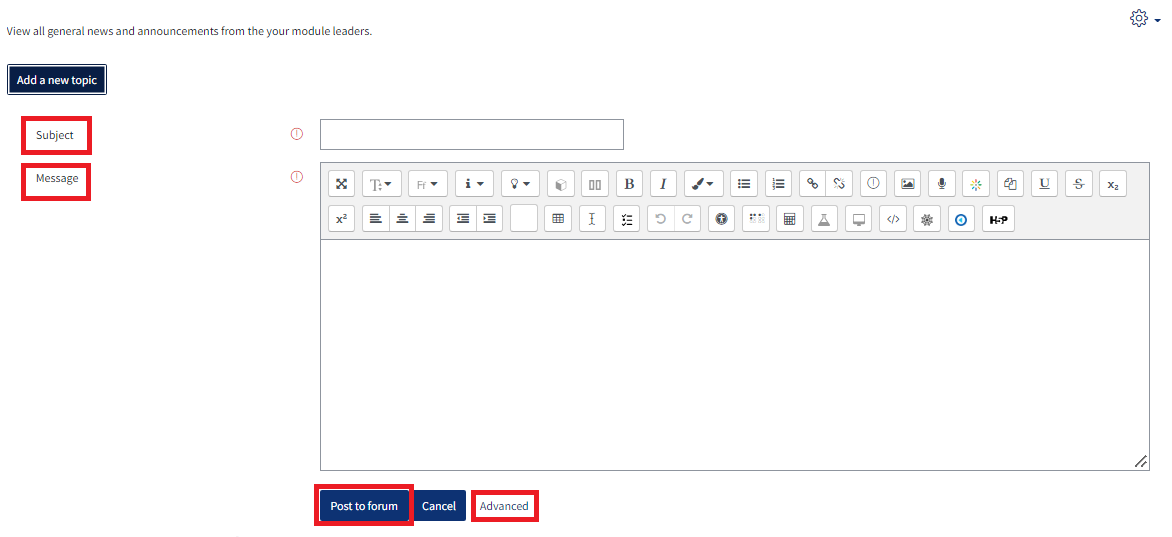
2. Click on ‘ADD A NEW TOPIC’.
3. Give your post a ‘Subject’ and ‘Message’.
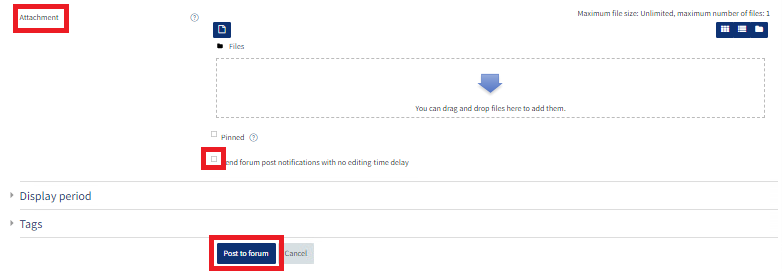
4. You can attach a Word document, PowerPoint or other file. To do so click the ‘Advanced’ button.
5. By default there is a 30 minute delay before the message is sent, this allows time to edit the message. To remove the 30 minute delay, so your message is sent immediately, tick the ‘Send forum post notifications with no editing-time delay’ box.
For more features of the module announcements forum and how to create other forums, use the following guides – Using Forum and Forum Activity.
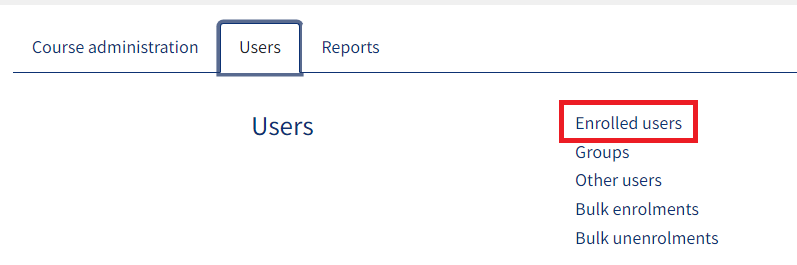
Contacting students using the enrolments section
1. Under the module SETTINGS, click on Users, then Enrolled Users.
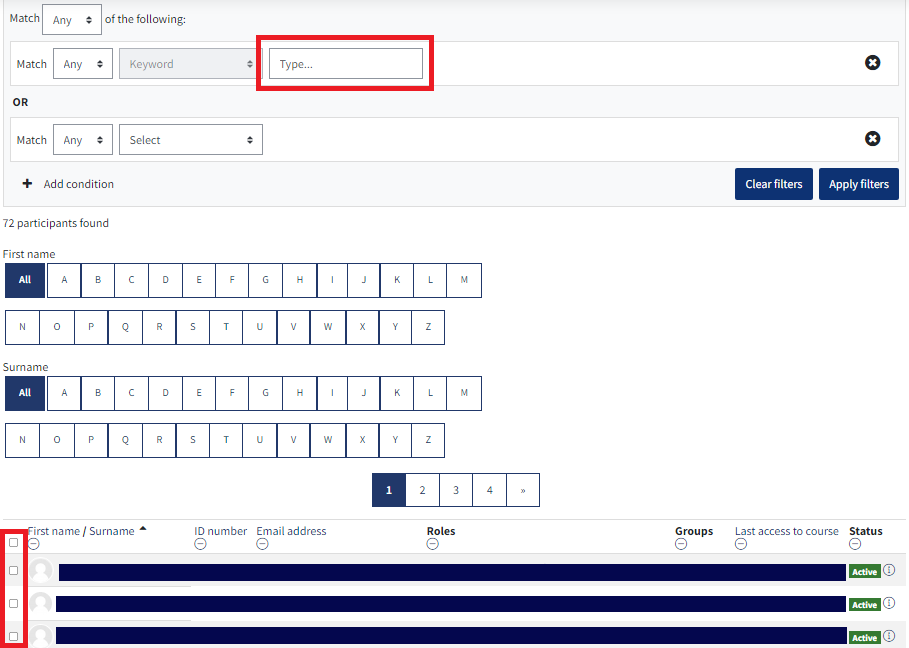
2. You will now see a list of the enrolled participants. To view a list of your students, use the filter option at the top of the screen.
3. You can either select individual students by clicking the tick boxes next to each name or if you want to contact all your students then, at the top left of the list, tick the unchecked box.
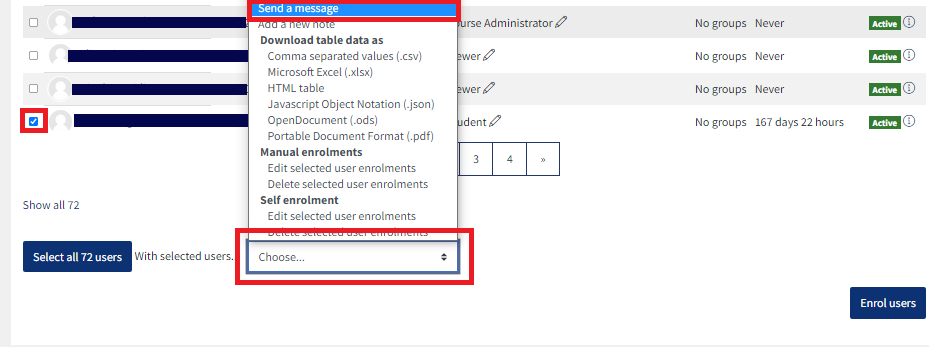
4. Once you have selected the student/s you wish to message, scroll to the bottom of the page and open the menu entitled ‘With selected users…’.
5. To email your students, select ‘Send a message’. Alternatively you can click on ‘Add a note’ that will appear on the students’ screen the next time they access QMplus.
The Messaging Interface
-
-
-
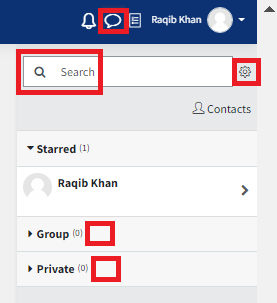
- Click the Message icon to toggle in or toggle out of the messaging window
- Click the Gear icon to personalise your messaging preferences (e.g who can message you and your notification preferences)
- Group conversations – Groups that have ‘group messaging’ enabled will appear in the Group drawer.
- Private conversations can be found here
- The search box can be used to search discussion
-
-
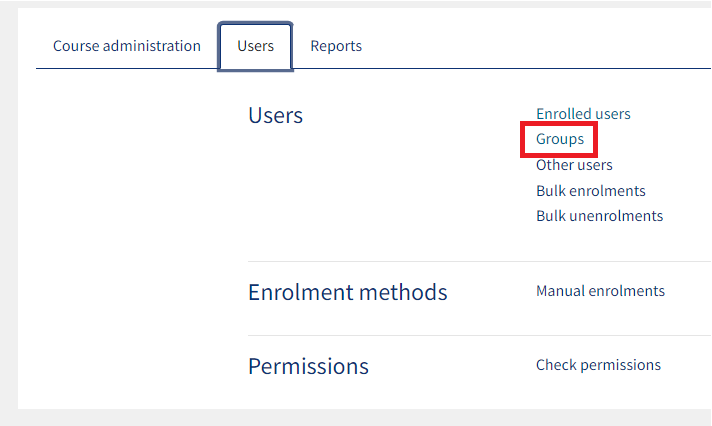
To turn on ‘Group messaging’ for a group, from the settings block, go to Users > Groups. You can then click on the group you wish to edit and click on ‘Edit group settings’. On the next page, change ‘Group message’ to ‘Yes’.
Open a discussion for more settings. There is a mute/unmute option in group and private conversations and if a conversation is muted, email notifications will not be received. For conversations that are not muted, a digest email will be sent.
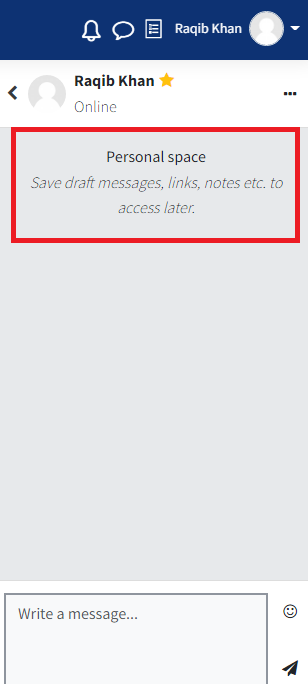
In the Starred messaging section, there is a new personal messaging space for to-do lists, draft messages or reminders.
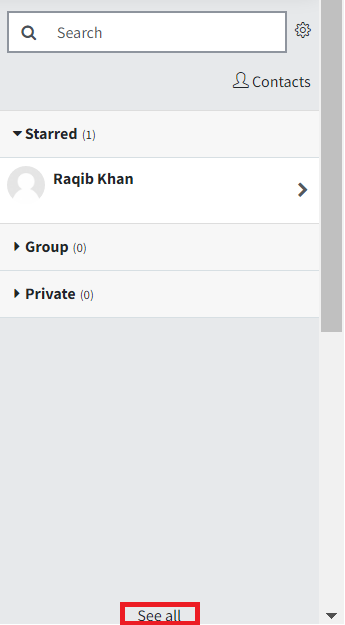
Select the ‘See all’ button at the bottom of the messaging interface to navigate to the full messaging page where, from July upgrade, there is an improved two column layout.
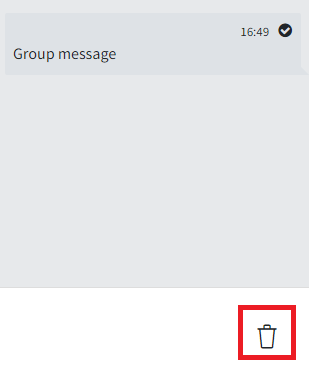
Finally, when using group messaging, teachers are now able to delete unwanted messages in a conversation for the whole group. Simply select the message you wish to delete, and press the bin icon.
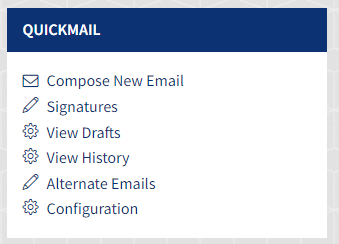
Contacting students via the Quickmail block
If the Quickmail block hasn’t been added to the course area, one can turn editing on, go to ‘Add a block’ and select ‘Quickmail’ from the drop down menu.
One can then email individual students, or groups of students (and a history of all emails sent out is available too)
Full details on the Quickmail block can be found (here)
