
Using the Assessment Panel in QMplus to organise assessments
There are many ways to organise assessment information in QMplus. The most effective way to do this is by using the Assessment Panel in the top navigation menu in your module.
This short video explains the Assessment Panel in 1 minute. Below is a step by step guide.
This guide covers:
How to add assessment activities and documents to the Assessment Panel in 3 steps:
- An overview of the Assessment Panel
- Step 1 – Add assessment documents to a topic
- Step 2 – Select this topic to add it to the assessment panel
- Step 3 – Add assessment activities to the panel
As well as:
An Overview
The Assessment Panel allows you to collate all assessed activities and resources into one area. Your assessments will also be available within the topic structure on the main page but the assessment panel pulls items, that you have chosen, into one central place.
It is possible to add additional content to the panel, such as coversheets, or special instructions so that students can easily access all the resources related to their assessments. You choose which activities and resources to display in the assessment panel.
The Assessment Panel makes it easier for the students to see, at a glance, all the coursework that they will need to complete for a particular module.
Step 1 – Add assessment documents to a topic
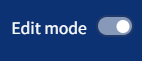
First, ensure that you are in ‘edit mode’ in your module area by clicking the button in the top right of the page.
Choose a topic on your module page, or create a new topic, and add resources or documents that you would like to appear in the assessment panel (not the actual assessments). This could be cover sheets, assessment instructions or general assessment information.

This topic and its contents will display in the assessment panel using the step that follows.
Step 2 – Select this topic for the Assessment Panel
From the module settings, scroll to Assessment information field and select your chosen topic, from step 1, from within the drop down menu. This is to add it to the Assessment Panel.
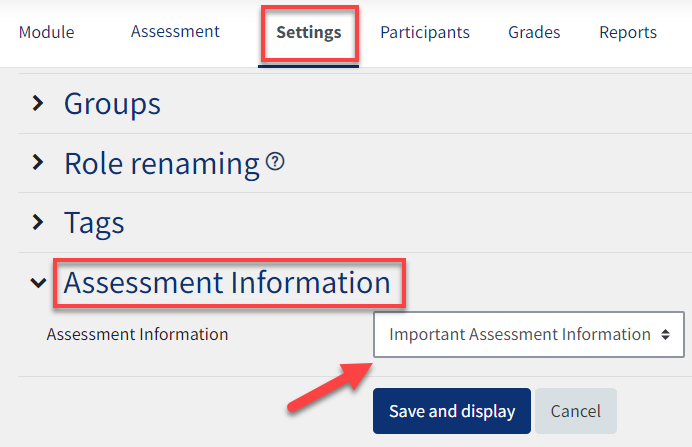
Your topic will now fill the left side of the assessment panel (and the topic will disappear from the main module page).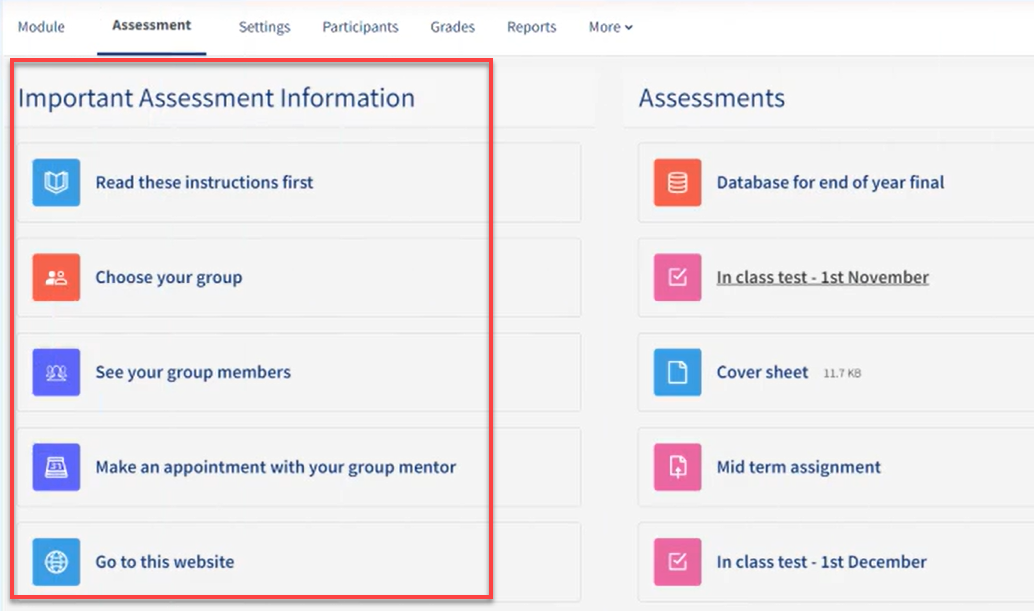
Step 3 – How to add assessments to the Assessment Panel
First, decide what assessments you want to add to the panel. These can be quizzes, forums, choice questions, assignments, glossaries etc. It is all up to you.
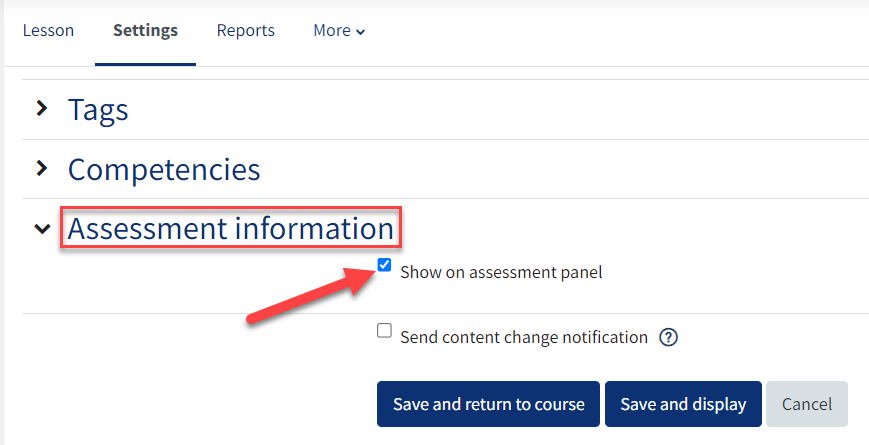
Then, from each assessments’ settings, scroll to the end and open the ‘assessment information’ option. Tick the ‘show on assessment panel’ checkbox.
Save these changes.
Your assessments will display on the right side of the assessment panel.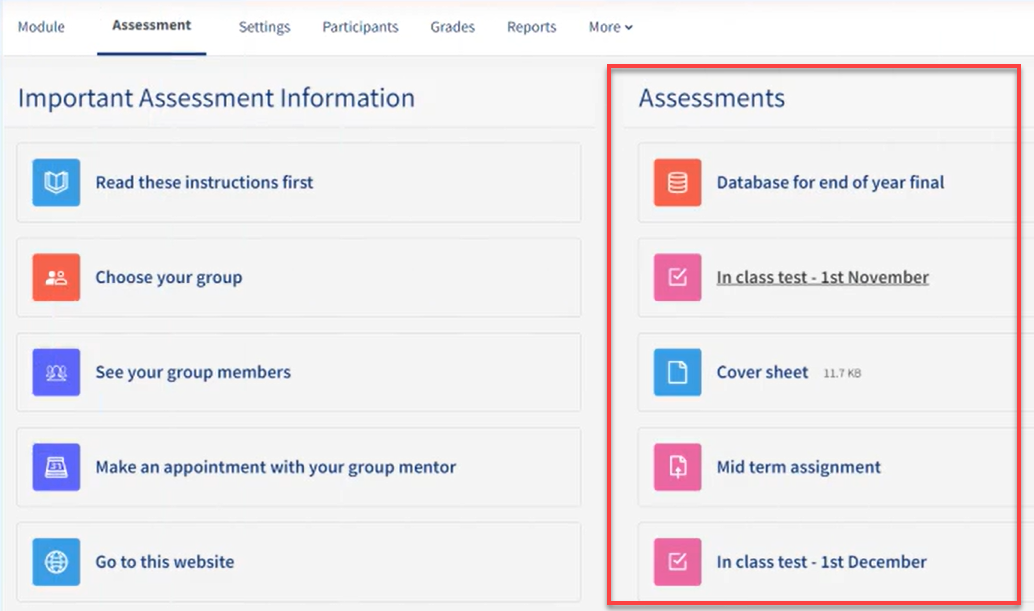
How to add and remove activities and resources from the Assessment Panel
Once the assessment panel has been set up using the steps above, the Assessments section on the right hand side of the panel will display all assessed activities that you have chosen to display. The left hand side can be used to provide easy access to useful assessment resources.
You can add and remove items from the panel in the same way that you would in any other topic.
Please note: If you delete the item from the panel, it will be deleted from the module. For example, if you delete an assignment activity from the right hand side, this will delete it from the module page completely. If you would like to remove an assessment from the panel, but keep it on the main page (for example if it isn’t a formal assessment) then you should:
- Click the three dots next to the assessment (in edit mode)
- Select ‘edit settings’.
- Scroll to the the assessment information section and untick the ‘Show on assessment panel’ option.
Note: Students will not see assessment items that they do not have access to, due to restrict access settings.
