Enrolment/Access: QMplus Enrolment Mapper (Admin)
The QMplus Enrolment Mapper (QEM) enables the automatic enrolment of students onto QMplus course areas through data taken from the student record system (SITS). Automatic enrolments are predominantly done on a module basis, i.e. all students on a particular module are enrolled onto a particular course area on QMplus. However, QEM allows us to define much more sophisticated automatic enrolment rules, e.g. enrol all taught postgraduate students in this department onto this course area, or enrol all first year students on this programme of study onto this course area. Those with access to the QEM tool can create new enrolment mappings and edit existing mappings.
This guide covers:
How to log into the Enrolment Mapper
There are two different ways of accessing the enrolment mapper:
- Through the Course Mapping block in a QMplus course area (see our guide on the Course Mappings Block if you are unsure how to add it)
- Directly using a web browser and going to https://webapps2.is.qmul.ac.uk/qem
Using the Course Mapping block
If you have added a Course Mapping block to a course area in QMplus, it will appear in one of the following ways:
You can access the enrolment mapper by either clicking on one of the mappings, or clicking on the “View enrolment mapper (QEM)” link. In the first case you will be taken directly to the details of the mapping you clicked on, in the second case you will be taken to the mapper home page.
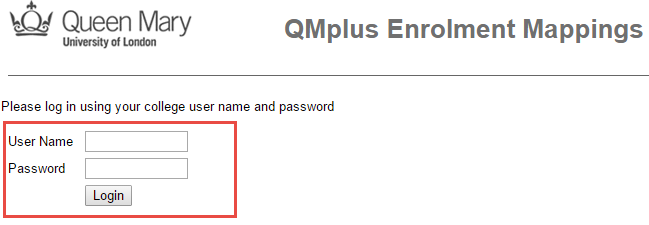
In both cases, you will be taken to the login page for the mapper where you will have to log in with your standard QMUL user name and password.
How to search for an existing mapping
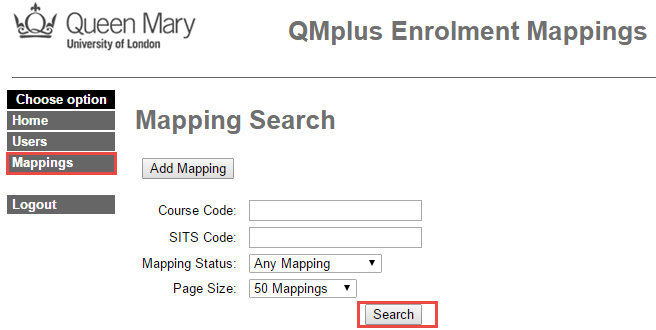
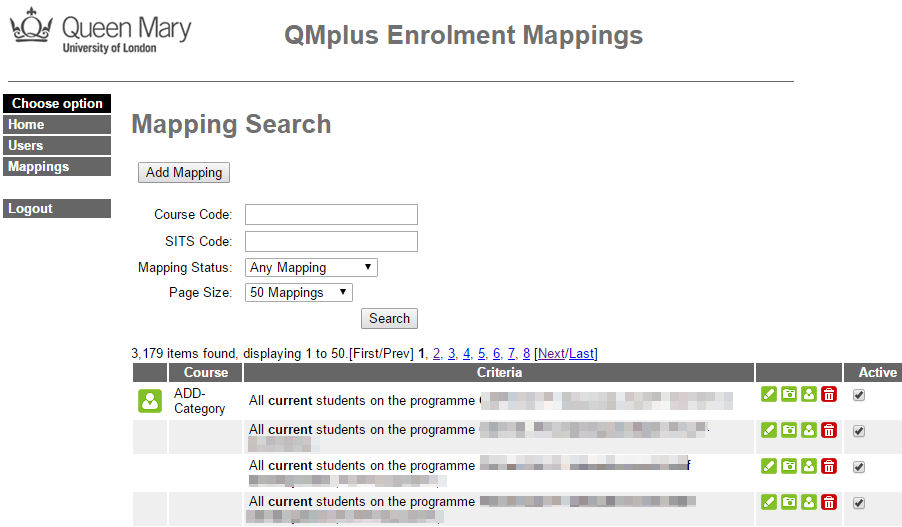
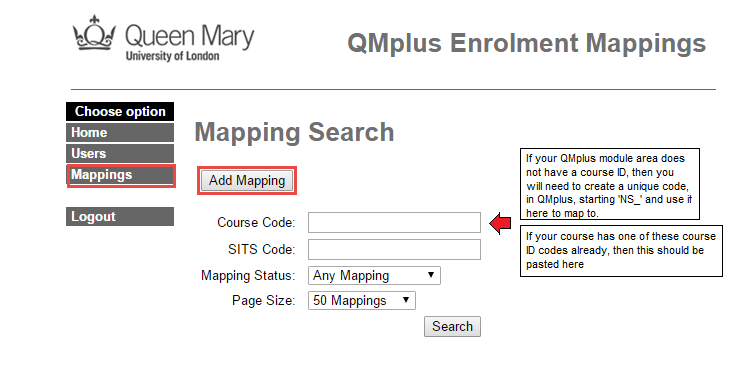
To list all available mappings, click on Mappings in the left menu and then click Search. This will display all of the mappings that you have access to. This will look something like the following:
It is also possible to search for the mappings associated with particular QMplus course area. In this case, you should enter the course id for the course and then click Search

How to create a new mapping
To create a new mapping, you will have to know the course ID of the course area on QMplus that you want to create the mapping for. You will find this on QMplus in the course settings.
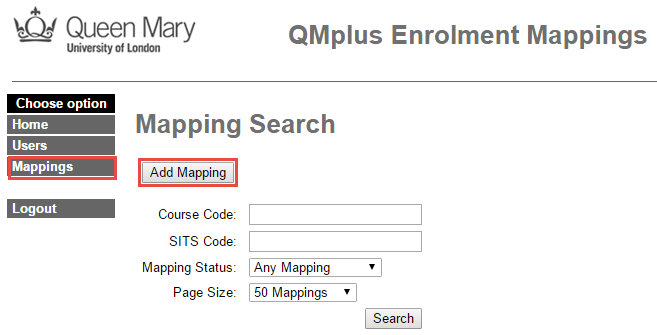
Log in to the QEM and click on Mappings in the left navigation bar and then click the Add a mapping button.
You should now see the Add Mapping page. 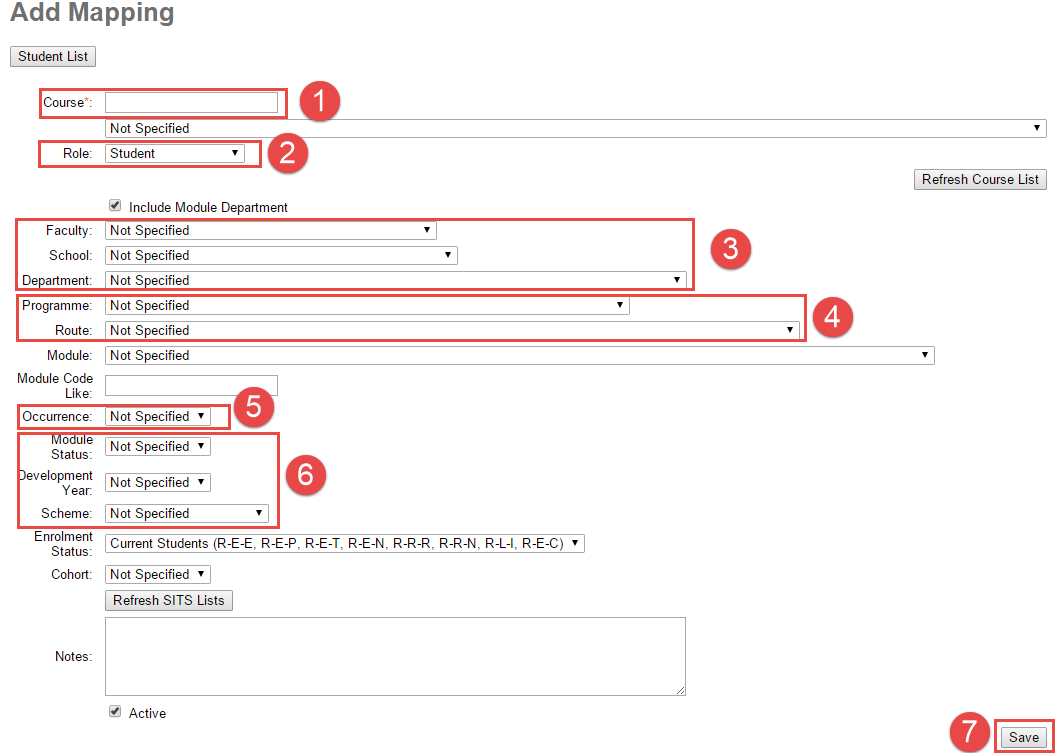
- Course: Enter the course which is the course id of the course that can be found within QMplus. If the course requires the students to have access each year then add an * at the end of the mapping removing the year. For example, change from ABC123-A14 to ABC-123*
- Role: From the drop down list, select the correct role. By default it has been set to Student. However, you may need to change it if you would like an alternative role to be enrolled.
- Faculty, School and Programme: From the drop down list select the correct option for each one
- Programme and Route: From the drop down list select the correct code. This information can be found in SITS.
- Occurrence: From the drop down list, choose the occurrence suitable for this mapping. If you have used an * within the course option then choose the occurrence with an *. For example, A* or B*
- The following settings are optional and should be set if they are required for this mapping.
- Module Status: From the drop down list, select the correct module status. You may want to only enrol students of a particular status for example all resit students. Therefore you will need to ensure this option is set to resit students so that it only enrols students of this status.
- Development Year: From the drop down list, select the correct developmental year so the year that needs to be enrolled on the course.
- Scheme: From the drop down list, select the correct scheme. For example, you may want to enrol all undergraduate students on this course therefore you will be required to set the option to undergraduate.
- Click on save to create the mapping.
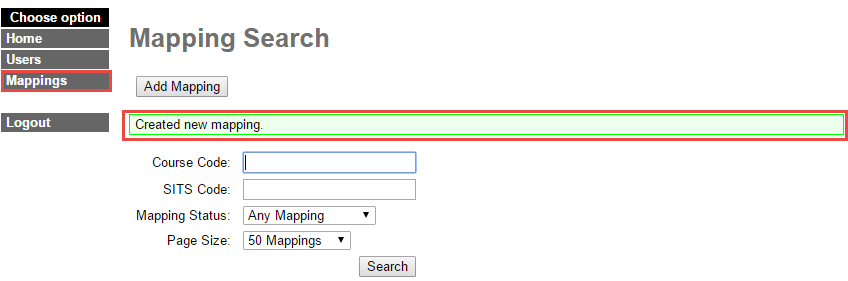
You will then be taken to the Mapping page where you will be provided with a confirmation that you mapping has been created.
(b) Mapping using module name
1. From the mappings page, click on Add a mapping.
 2. You should now see the Add Mapping page.
 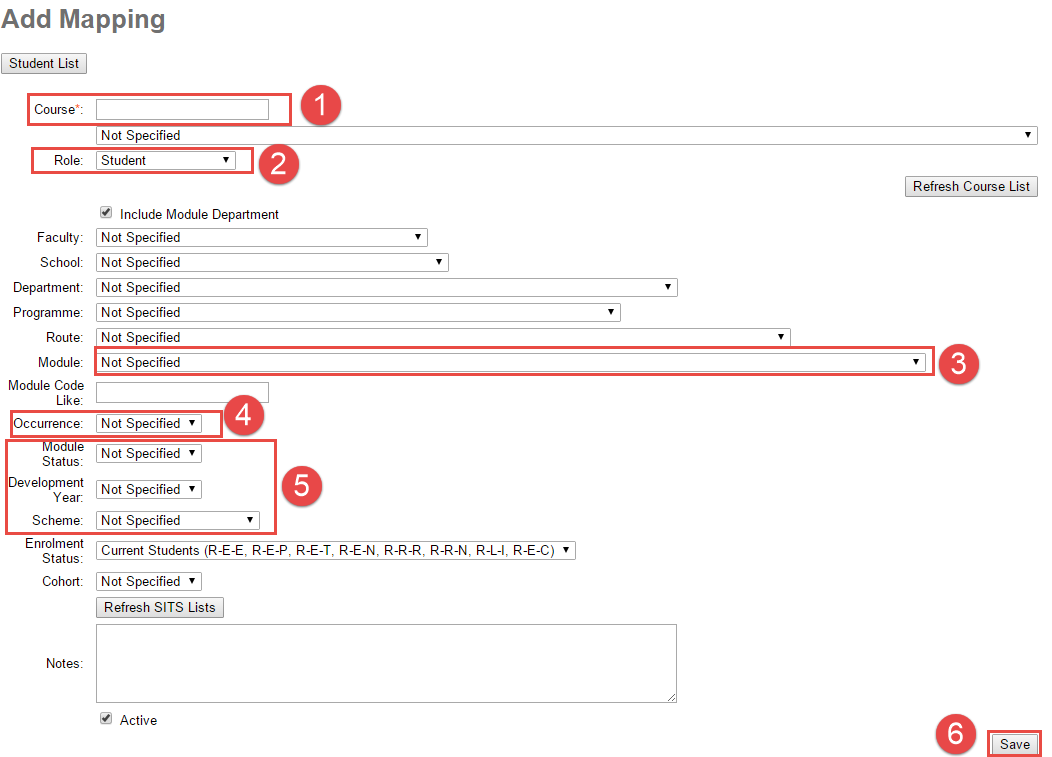 (1) Course: Enter the course which is the course id of the course that can be found within QMplus. If the course requires the students to have access each year then add an * at the end of the mapping removing the year. For example, change from ABC123-A14 to ABC123-A*.
(2) Role: From the drop down list, select the correct role. By default it has been set to Student. However, you may need to change it if you would like an alternative role to be enrolled.
(3) Module: From the drop down list, select the module you would like to map to.
(4) Occurrence: From the drop down list, choose the occurrence suitable for this mapping. If you have used an * within the course option then choose the occurrence with an *. For example, A* or B*.
(5) The following settings are optional and should be set if they are required for this mapping.
- Module Status: From the drop down list, select the correct module status. You may want to only enrol students of a particular status for example all resit students. Therefore you will need to ensure this option is set to resit students so that it only enrols students of this status.
- Development Year: From the drop down list, select the correct developmental year so the year that needs to be enrolled on the course.
- Scheme: From the drop down list, select the correct scheme. For example, you may want to enrol all undergraduate students on this course therefore you will be required to set the option to undergraduate.
(6) Click on save to create the mapping. 3. You will then be taken to the Mapping page where you will be provided with a confirmation that you mapping has been created.
How to edit a mapping
Find the mapping you want to edit by either:
- Clicking on the appropriate mapping in the Course Mappings block on QMplus
- Searching for the mapping in the enrolment mapper
1. From the Mappings page, search and find the mapping you would like to edit .
2. Click on the edit icon. 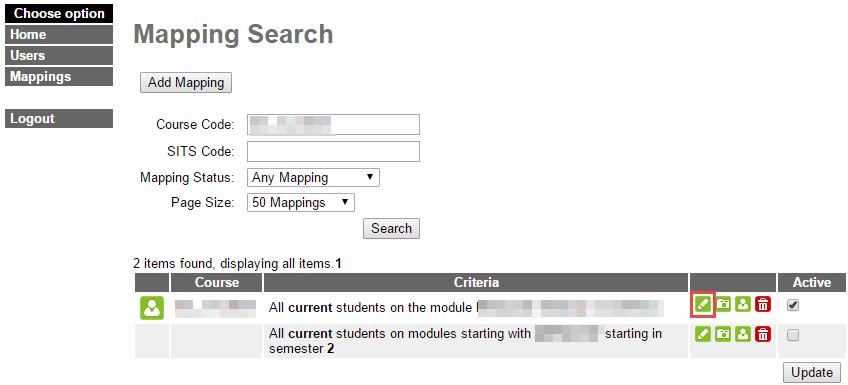 3. This will take you to the Edit Mapping page. Edit the mapping where needed. (1)
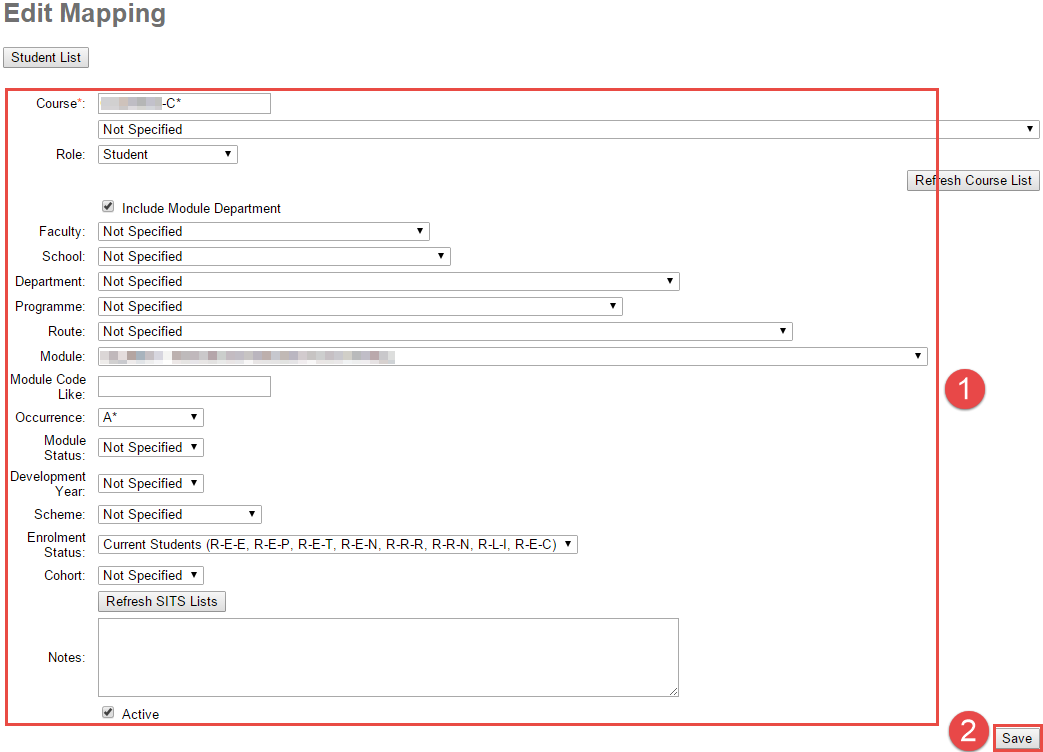 4. Once you have completed editing the mapping. Click save to ensure the updates of mapping has been saved. (2)
5. You will then receive a message to confirm your mapping has been updated. 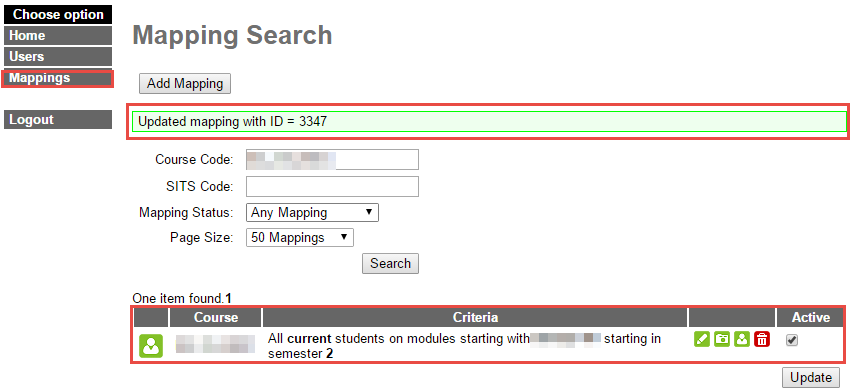 (b) Activate/De-activate a mapping
1. From the Mappings page, search and find the mapping you would like to make activate/deactivate.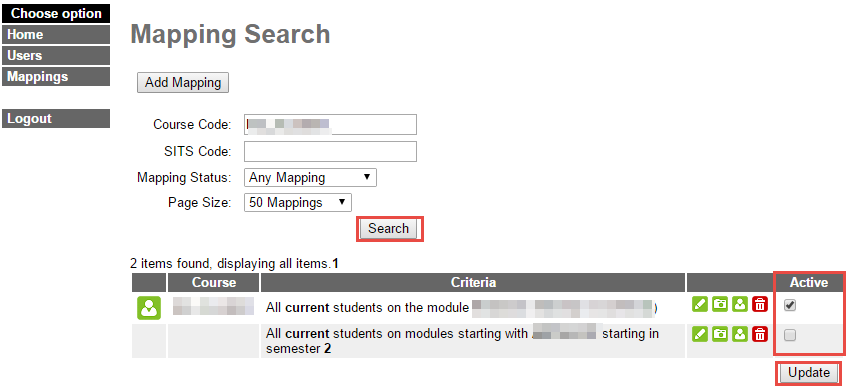 2. To active a mapping, ticket the ‘Active’ option. To deactive a mapping, untick the ‘Active’ option.
3. Click on update to save the changes.
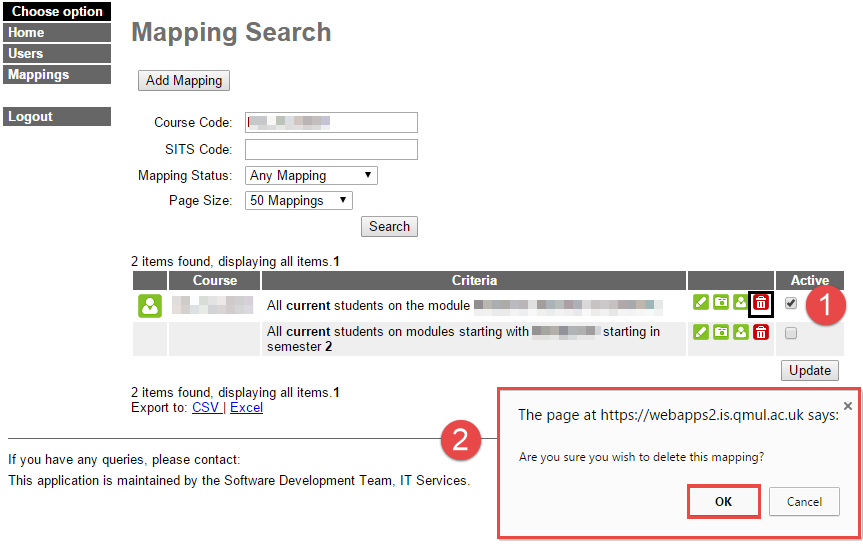
This option is only available for Central Administrators. Please raise a ticket with HelpDesk with the details of the mapping you wish to delete.
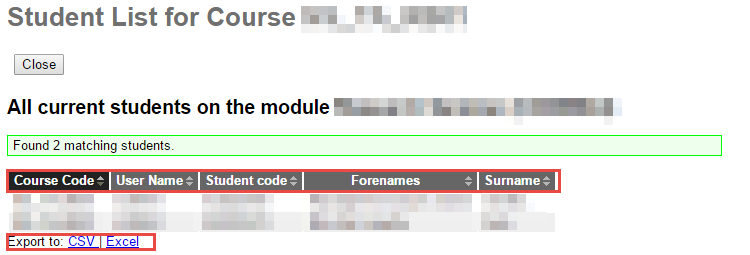
How to view a list of students enrolled
1. From the Mappings page, search and find the mapping you would like to view the list of students enrolled.
2. Click on the option ‘Mapping Student list.’  3. This will provide a list of all the students enrolled on that mapping.